Holiday Home Tour (Part 2)
I hope you enjoyed the first part of our Holiday Home Tour! Maybe I have even inspired you to make yourself a Fresh Cut Christmas Tree sign. If you don’t think you have the skill to paint, maybe this post will spark your interest with a couple of simple sewing projects.
Disclosure: As an Amazon affiliate, I earn from qualifying purchases at no extra cost to you. My blog contains other affiliate links as well for your convenience. To learn more, you may read my Disclosure Policy. Thank you for supporting my blog!
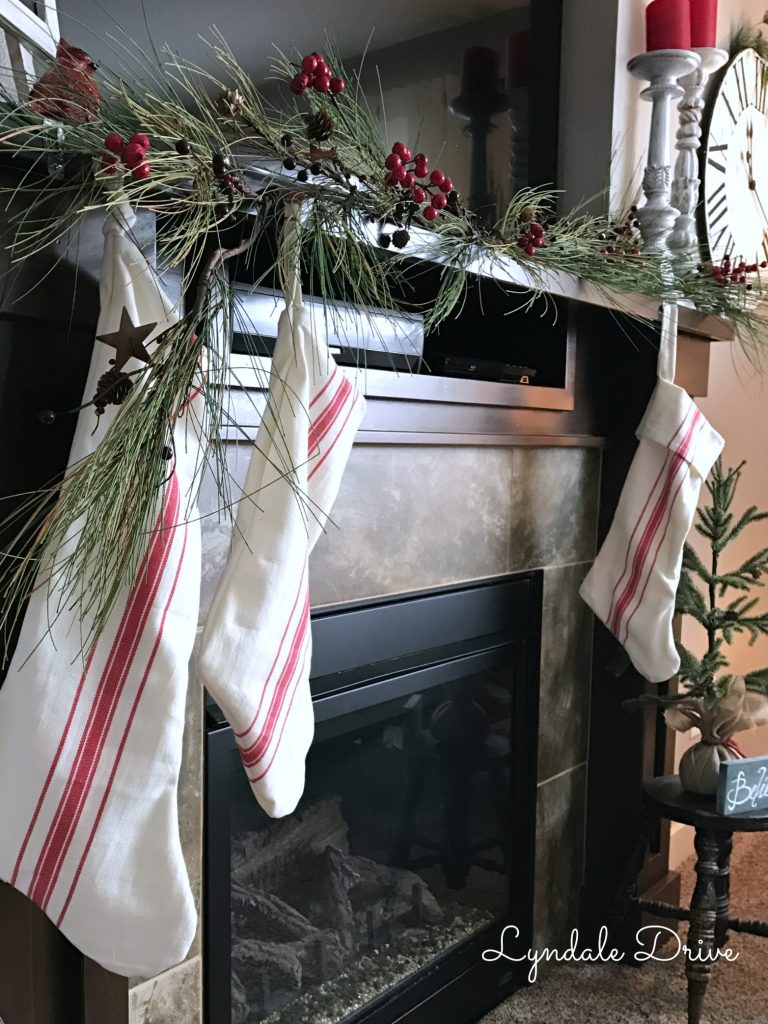
In keeping with the simple vintage farmhouse theme, I covered the mantel with this beautiful garland. I love how it looks like real branches from a long needle pine tree and the berries add a pop of color against the dark mantel. I added the white candle sticks to one side of the TV to add height and used red (battery operated) candles to top them off…….I don’t trust myself with real flames!
I have to be careful not to cover any of the electronics with my decorations…………Mike gets irritated when he can’t use the remote control from the comfort of his recliner! Remember when I made a “mock” mantel in my Dreaming of a Fall Mantel post? Yeah, well I am “jonesing” for my dream mantel, maybe next year I will have one! Until then, this is what I get!
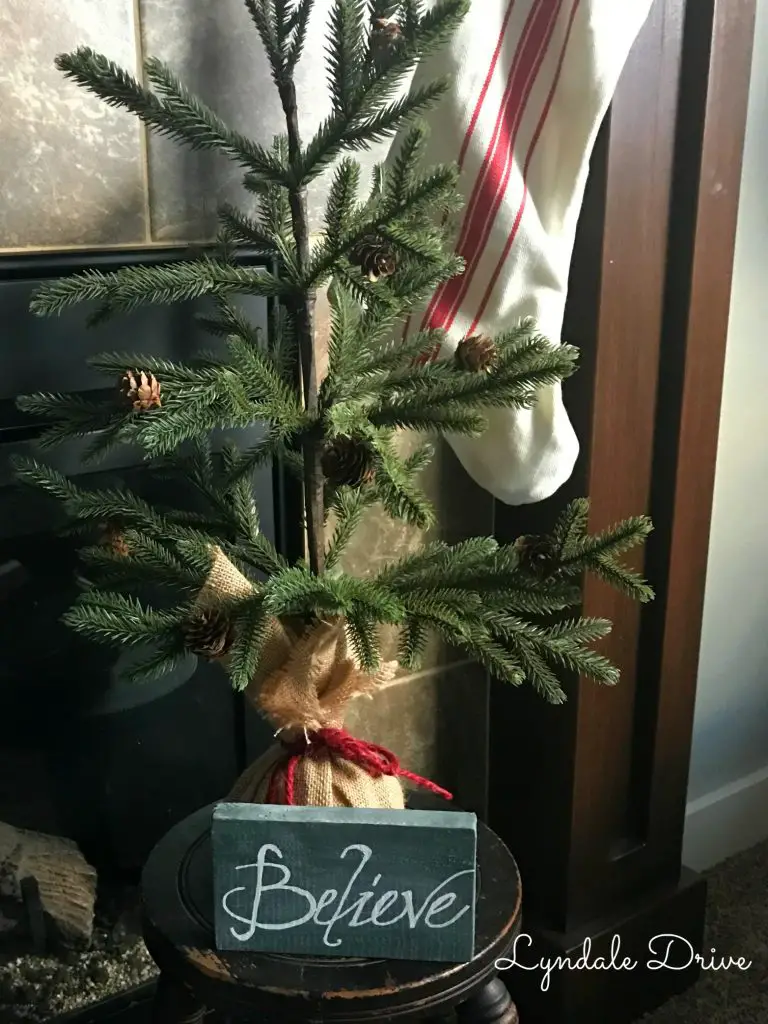
This year I found so many Charlie Brown looking Christmas trees. When I say Charlie Brown tree I mean the lonely looking tree with sparse branches…….the tree no one else wanted. Except me……..I love the simplicity of these little trees. This is the first year I didn’t actually put up a tree in our living room…..I couldn’t find the perfect spot for it……..believe me, I moved the furniture every which way and it all ended up right back where it started, so unless the tree was put in the middle of the room, I went without one this year (in the living room)! P.S. that little “Believe” sign…………super simple to make! Paint a little block of wood green (I used a color that reminded me of an old chalkboard) then treated it by coloring it all over with a piece of chalk and wiping it off with a dry rag, making the board look well “erased”! Then I simply used my chalk marker and wrote Believe! Super simple!

Grab my free Guide
Discovering Your Style, Love Your Home
Decorating your home and discovering your style doesn’t have to be difficult. This guide will help you to create a home using some simple design tips that will make your house feel more like a home. A place you love to be.

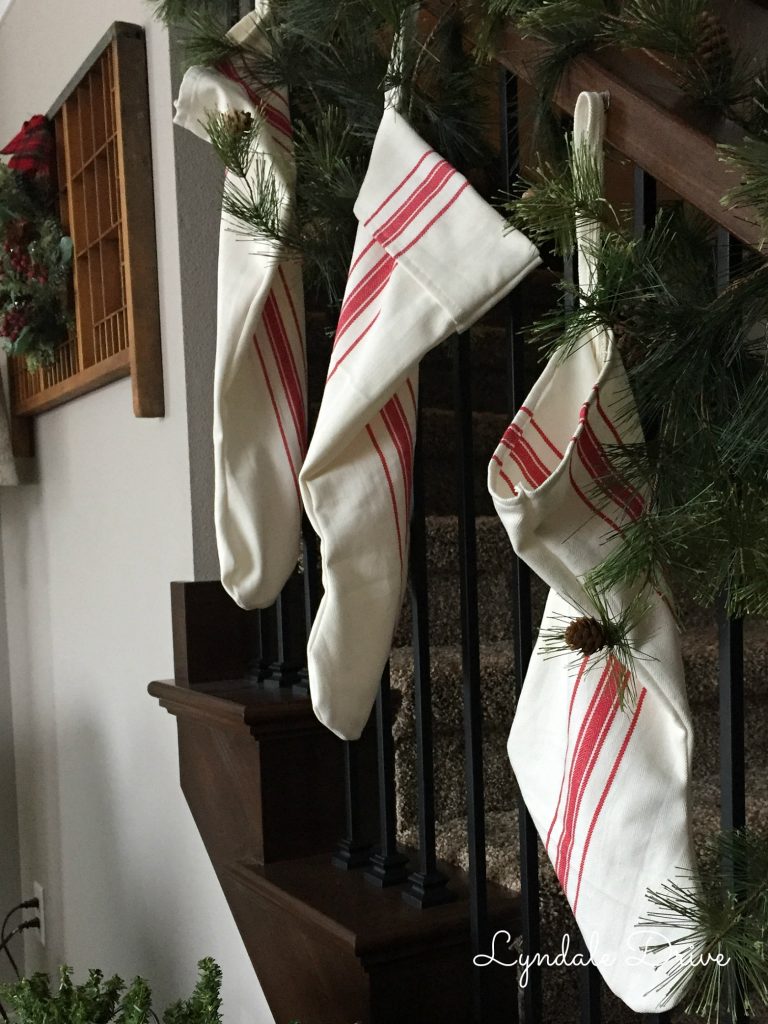
The stockings were hung by the chimney with care…………..Aren’t they cute?! Stockings are my favorite part of our Christmas traditions. I remember as a kid Santa filled our stockings with fun “necessary” stuff……socks, soap, tooth brush, tooth paste………why is getting a new tooth brush and a pair of socks so much fun at Christmas? I have carried on this tradition for our kids and now the grand-kidos……..so that meant Mrs. Clause needed to get busy and make MORE stockings!
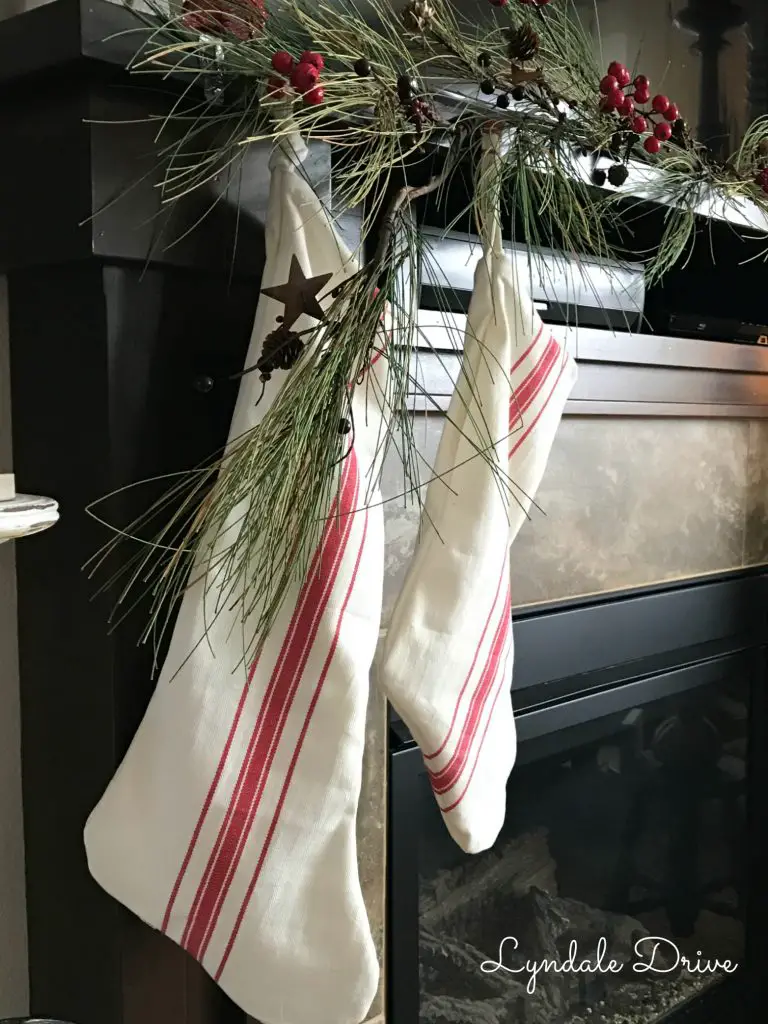
Our old stockings would have probably been sufficient, however – they didn’t match my vintage theme. Now you guys are going to think I have an addiction to Target……..maybe I do (don’t tell Mike) and don’t judge! Sooo, while at Target I found these adorable table runners that remind me of old feed sacks for $3. Check out this post to see how I turned them into super cute “vintage stockings”. I hung stockings from both the mantel and banister. They are all a little different…..I will show you how I made one style, however the others came out of trial and error…….Us bloggers don’t usually point out our mistakes! I just rolled with em’ and actually like how they all look a little different.
Our half bath couldn’t go with out decorations and since there is not a lot of “decorating” space in this room, I decided to add an antique sled to the wall above the toilet. If you want to score some great old sleds, check out Craig’s List!
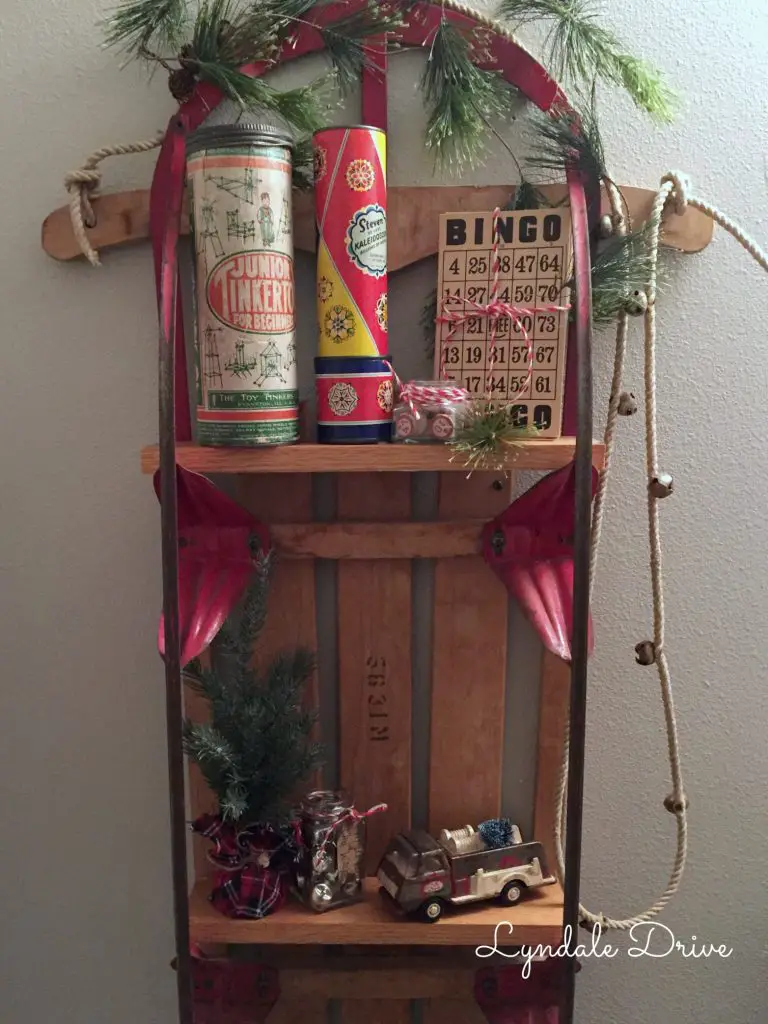
I had Mike help me add some oak shelves to the underside of the sled and screw it to the wall……….he almost had a heart attack knowing that he was making some gigantic holes in the wall due to the size of screws we needed to hold this sucker up! I calmed him down a little when I promised I would fill the holes after the holidays. Maybe I should tell him that this room is getting a little shiplap make over, similar to our master bedroom in January! See I told you I would fill (cover) the holes!!!
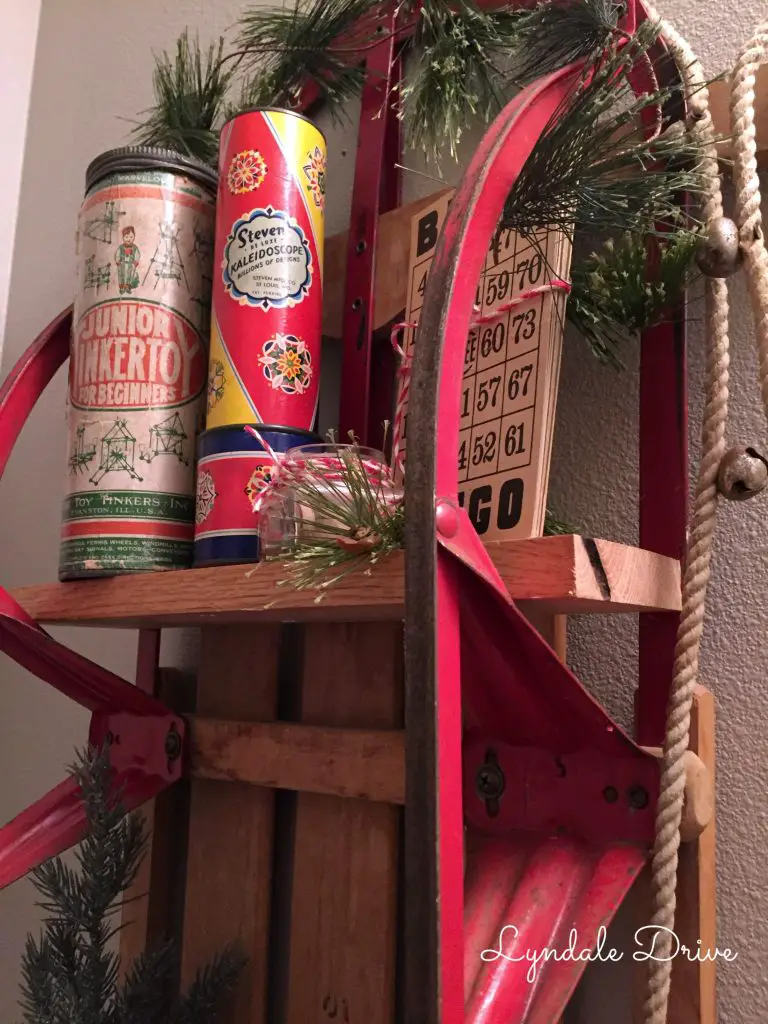
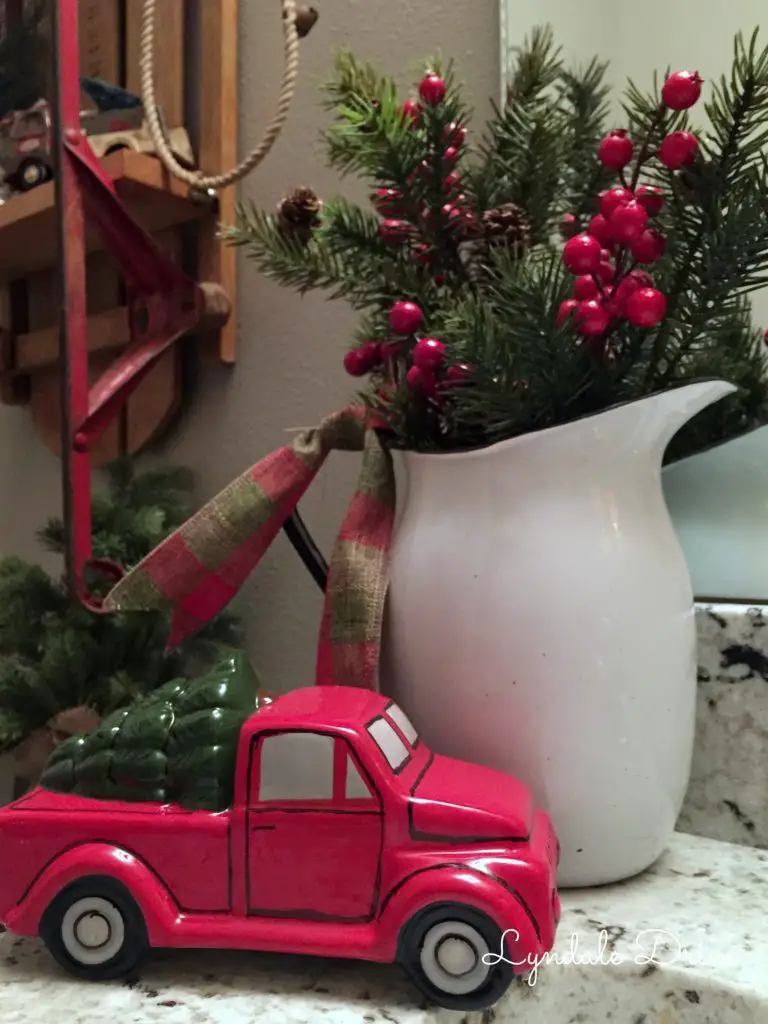
I love how the sled still has the original rope attached….. jingle bells included! My brother and I had one of these sleds when we were kids, what a death trap! Pretty sure my fingers were run over on more than once, surprised I have any left! I added more vintage toys and Christmas trees to the shelves to carry on the theme. I hate to even say it, but I picked up this cute little red truck at ………..Target…………Hey, it was only $3!!! I couldn’t pass it up!! How cute is it on the vanity with this old pitcher filled with greens and berries?!
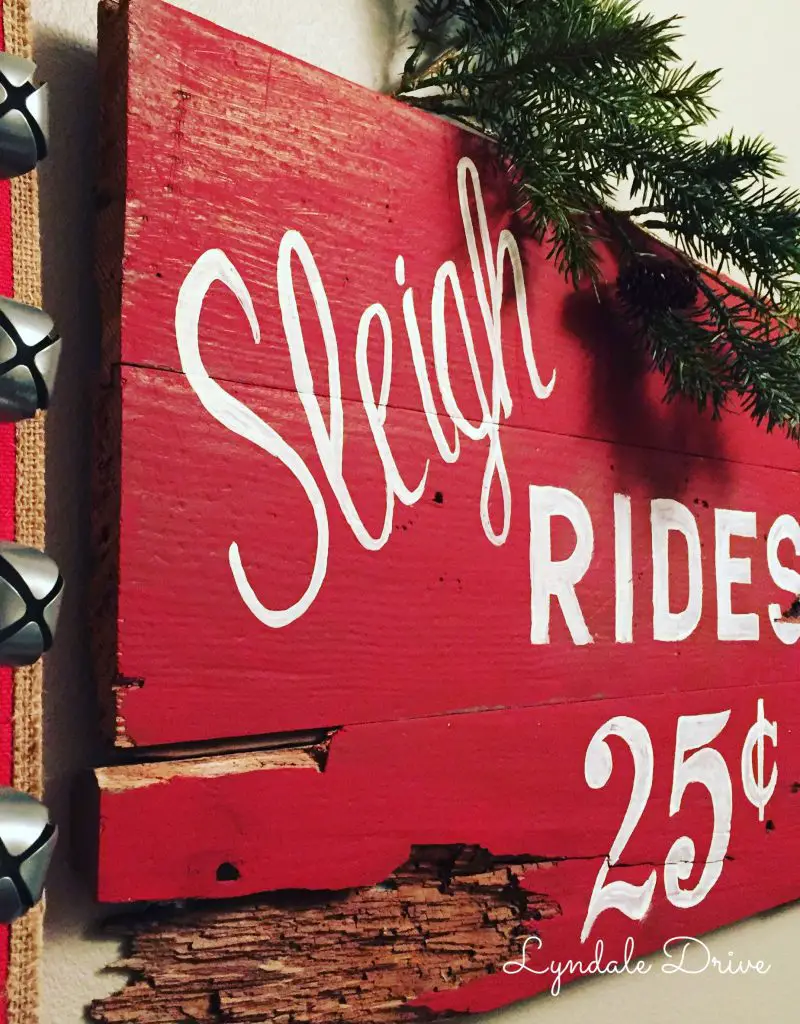
I finished the look by painting this “Sleigh Rides” sign, added a sprig of greens and a strap of bells………super cute and vintage, farmhouse feelin’!
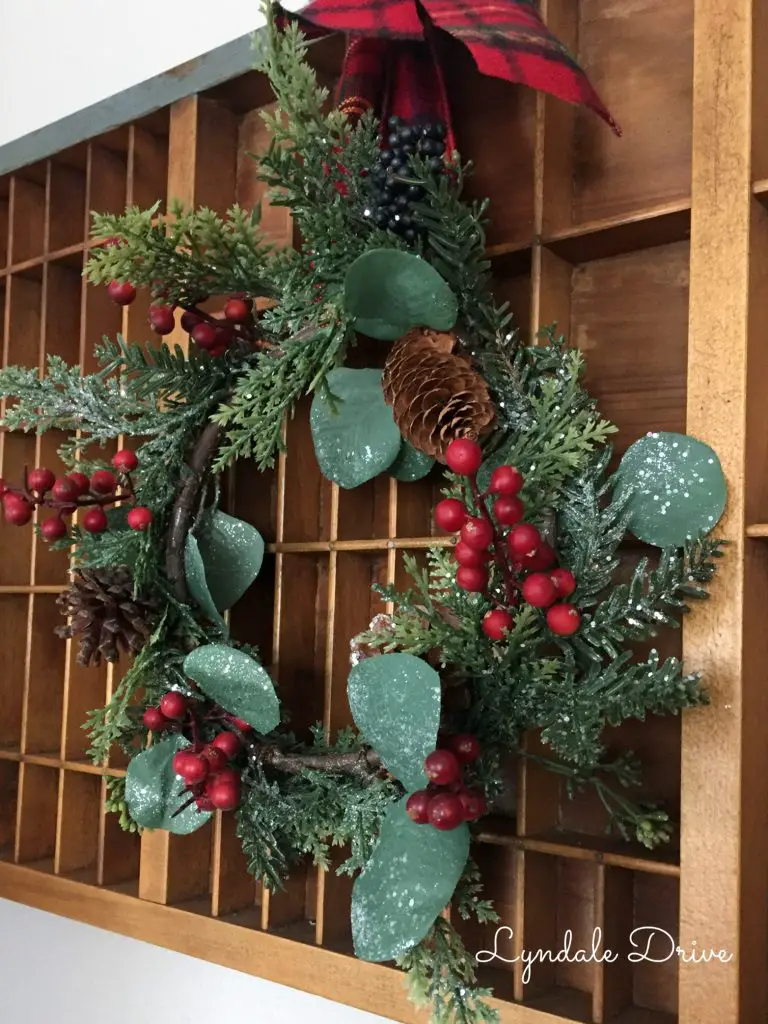
Ok, enough with the bathroom…….back out to the living room and keeping it simple. I used some small wreaths (actually candle rings) and hung them with plaid and red ribbon, adding color and the perfect touch of Christmas to wall arrangements I already had in place.

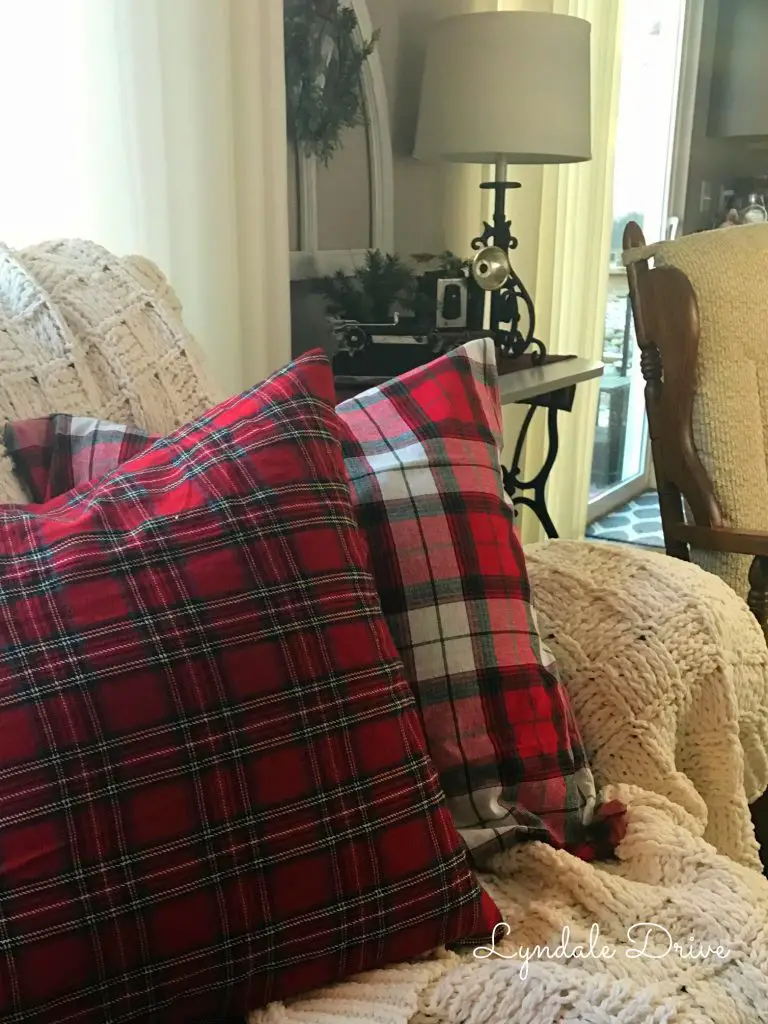
I found an old plaid table cloth that I have had for years and decided to use it to make a couple of pillow covers. Remember those old pillows I bought during my Craptastic weekend of Junking? Well check them out now! Making pillow covers is so simple and the cheapest way I have found to change my pillows for the seasons……….or my mood! See how I made them here.
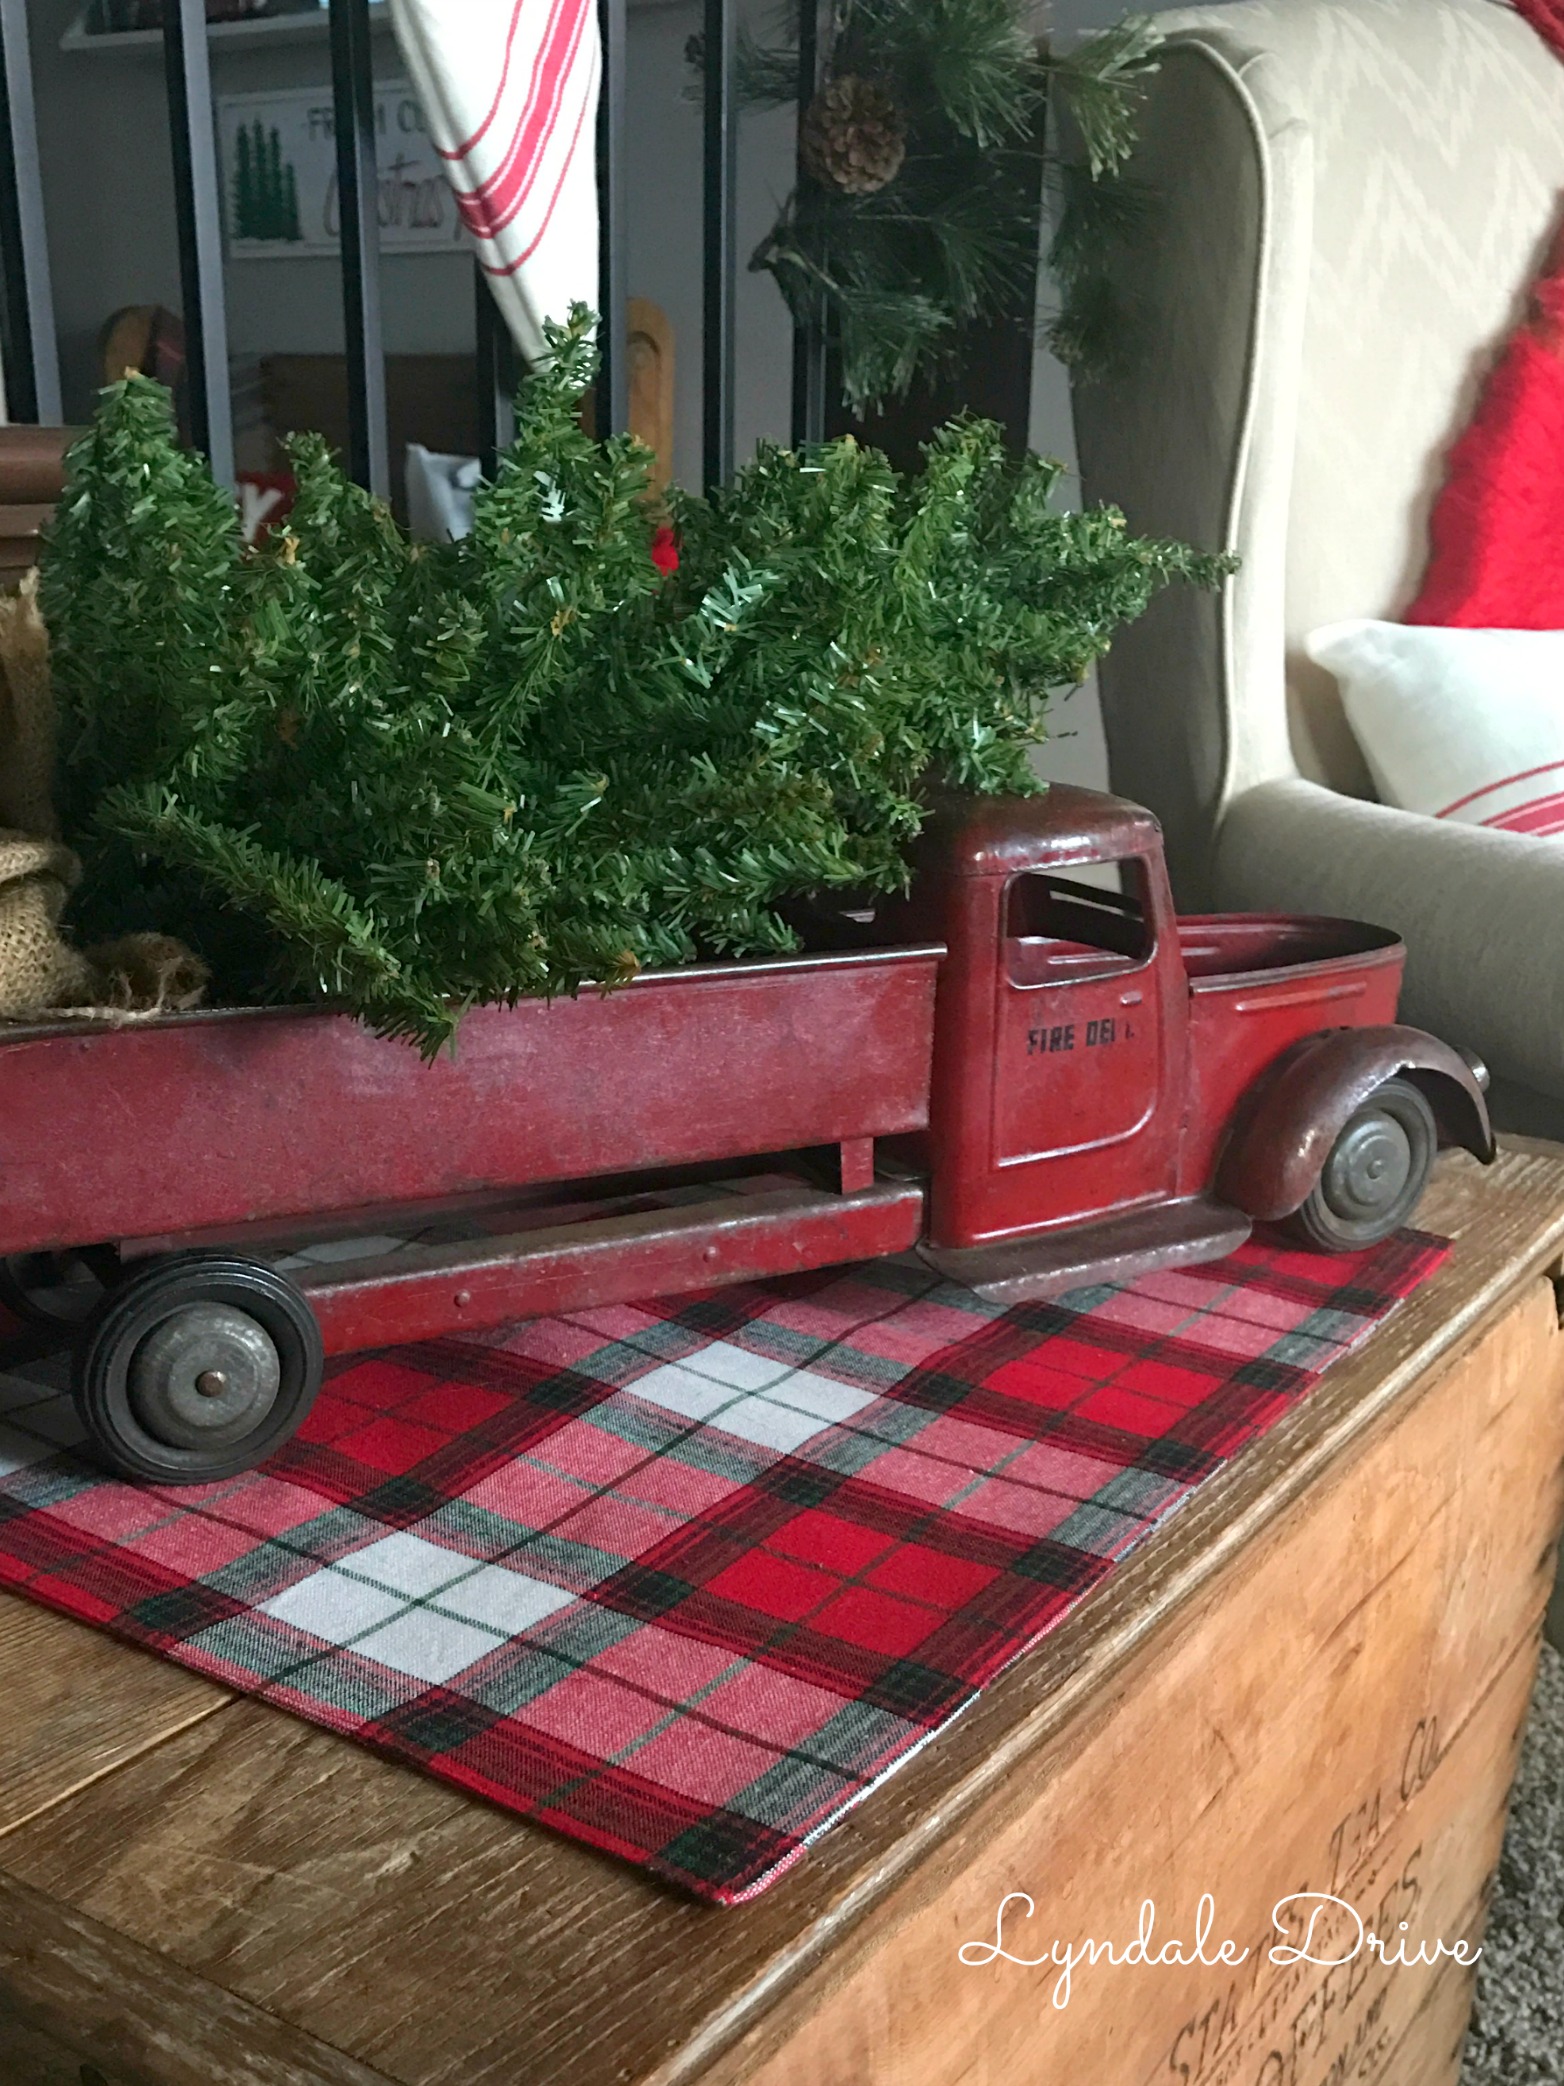
I had a some extra fabric so I made this little table cover to place on the wooden trunk I updated with the painted graphic. I think it serves as the perfect foundation for this antique fire truck filled with a Christmas tree.

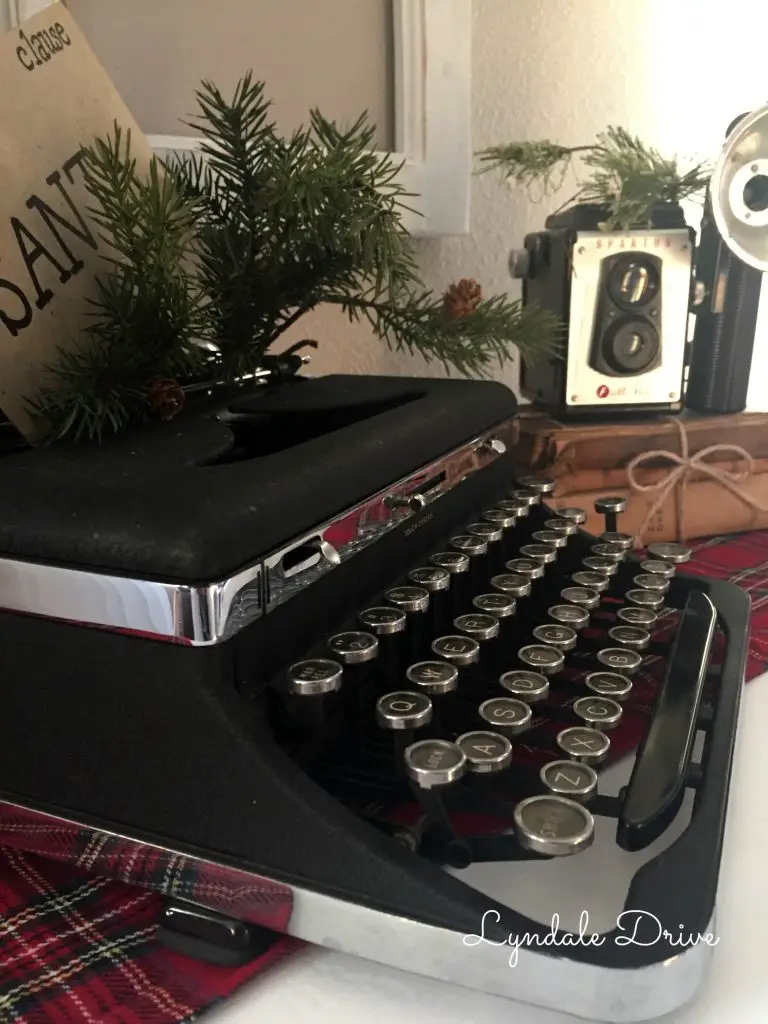
And one last stop on our Holiday Home Tour is this cute little table made out of an old sewing machine base. I added a plaid runner to give the white table some color and the antique typewriter (another Craig’s List purchase) for a whimsy feel. I added some greens and a little “Santa” card to keep it simple and fun.
I hope you have enjoyed part 2 of our Holiday Home Tour. Be sure to check out our Holiday Tour Part 1 if you missed it and stay tuned for more………….
You may also enjoy these related articles:
Did you enjoy this article? Want to hear more? Stay in touch! Sign up below to receive design tips and tricks for your home.
Let’s Be Friends
Join the Lyndale Drive Community!
Sign up to receive all the latest blog details, tips & tricks and a whole lot of fun!

All looks great, Jodi!!! Merry Christmas!!
Thanks Lynette – I need to get over to check out your new place
Jodi – love your creations❤ So beautiful!
Very pretty! I love it! ❤️
TheThingsIDo
Thank you Sandy, I am glad you enjoy it
Can you come and decorate my house please!!!! Pretty please!!! 🙂
You can do it Ashley! Hopefully I have inspired you a little!