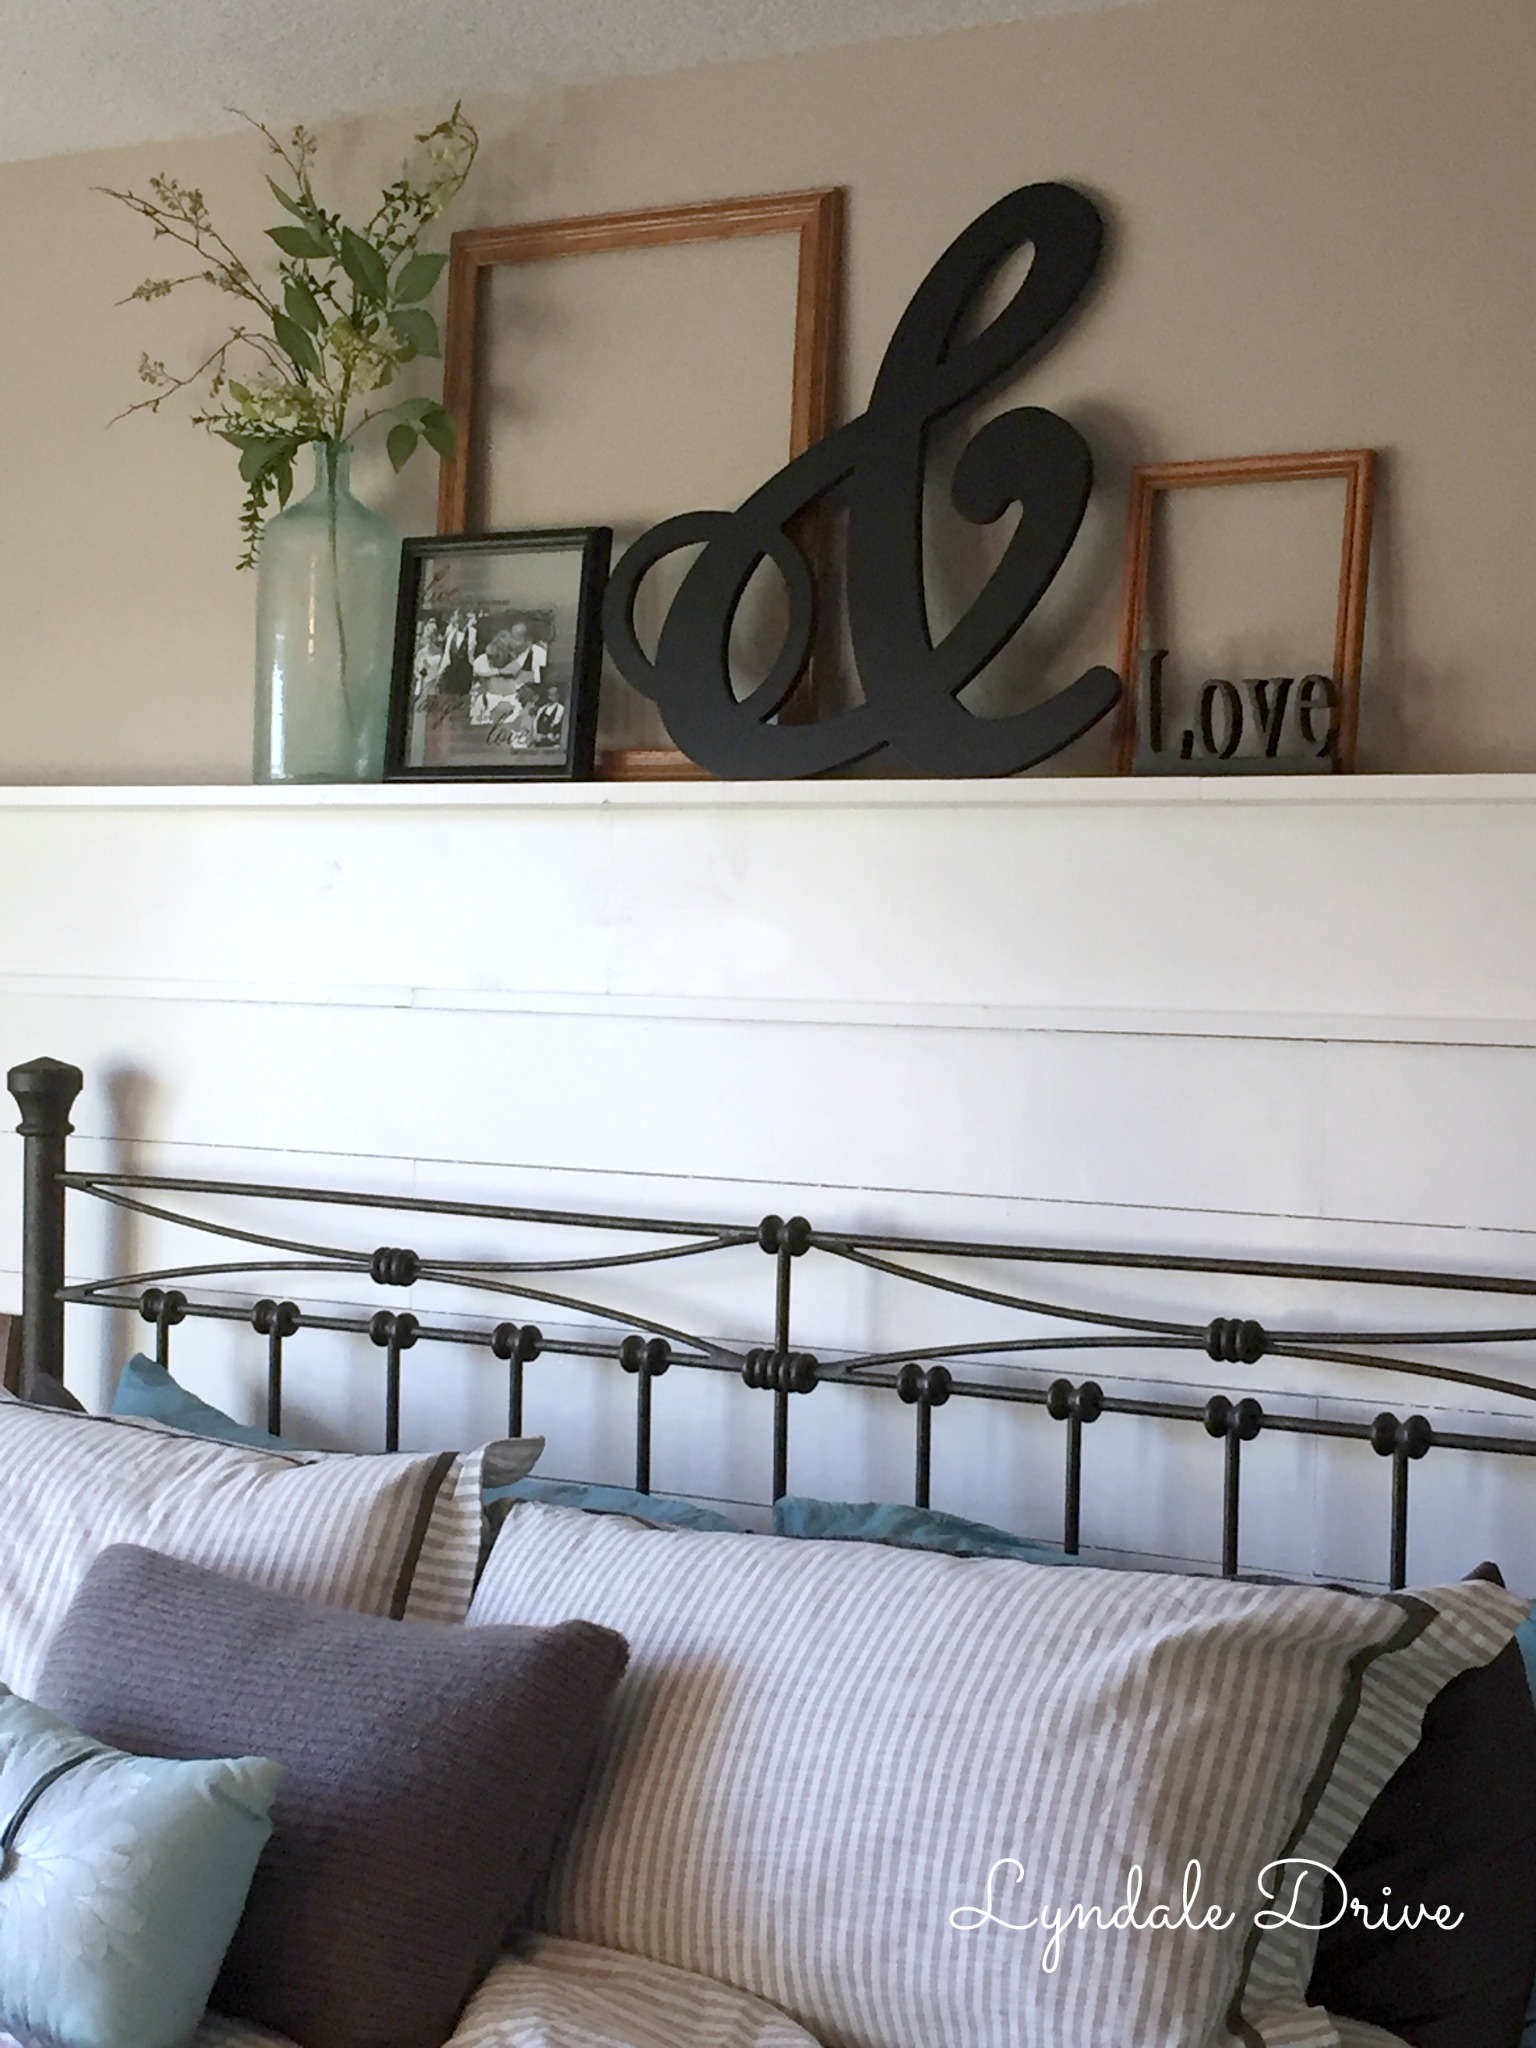
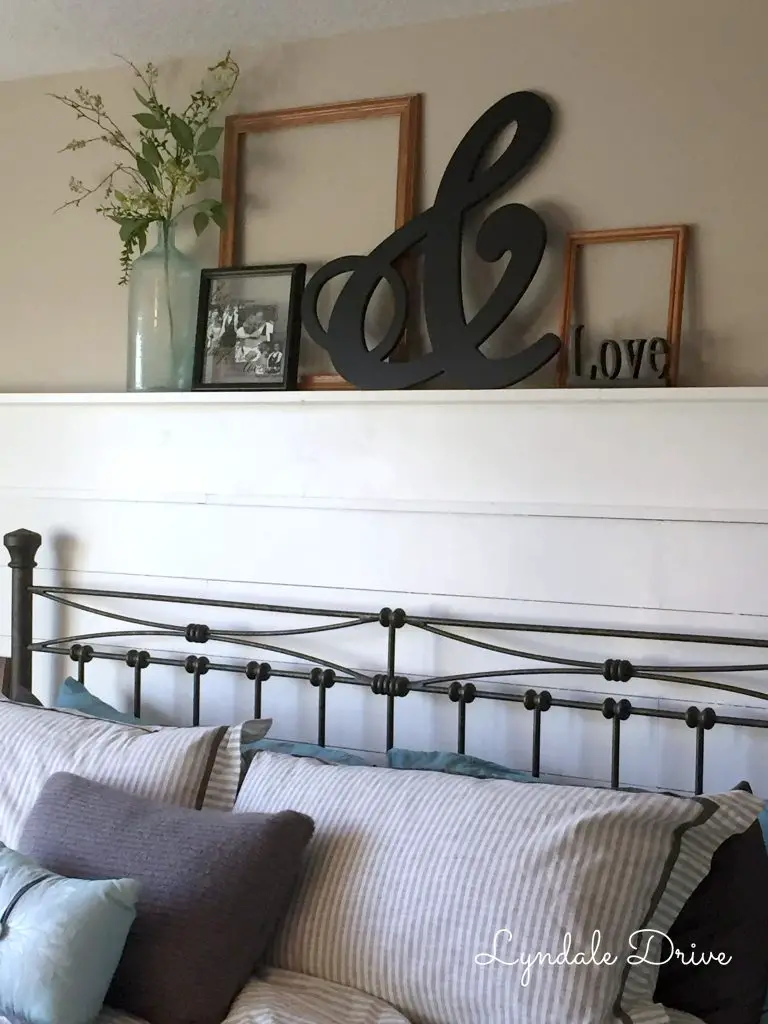
• Home
  • About Me
  • Our Home
    • Master
      • Shiplap Shelf
      • How to keep your white sheets white
      • How to upcycle old sweaters into Christmas stockings
      • Dimming the light that shines in the night
      • Master bedroom night stands
      • Our Master “Pinterest” bedroom……
      • Shiplap wall for less than $50
    • Mancave
      • How to build a sliding barn door
      • The Dog’s House
      • A Shiplap Ceiling
      • Painting a Faux Brick Wall
      • Upcycle old frames….I’ll show you how!
      • A bi-fold door in disguise……….
      • A place to call his own……..kind of!
      • how i made industrial lights for the bar
    • Front Porch
      • Hydrangeas are in the air
      • Red, White and Gray-It’s almost Independence Day!
      • Say Hello
      • Holiday Home Tour (Part 1)
    • Kitchen
      • Upholstery 101
      • Harvest Table – Part one
      • Harvest Table – Part Two
      • Holiday Home Tour (Part 2)
      • How to organize a mini office space in your pantry
      • New Bling {Cabinet Hardware} for the Kitchen
      • Transform your dining room table
      • Trays, not just for carrying your lunch in grade school anymore!
    • Living Room
      • Designing a fireplace makeover
    • Garage
      • Got Paint?
  • DIY Projects
    • Painting/Crafts
      • DIY Poster Sized Word Art
      • Fresh Cut Tree Sign
      • Farmers Market….
    • Simple Sewing
      • Add your favorite recipe to a tea towel
      • How to upcycle old sweaters into Christmas stockings
      • Vintage Stockings for $3 or less
      • Upholstery 101
    • Trash to Treasure
      • How to paint on old screens
      • New life for an old brass fixture
    • Miscellaneous
      • How to keep your white sheets white
      • New Bling {Cabinet Hardware} for the Kitchen
    • Electircal
      • how i made industrial lights for the bar
    • Woodworking
      • How to build a sliding barn door
  • Contact Me
    • Disclosures
    • Facebook
    • Instagram
    • Pinterest
    • Twitter

Lyndale Drive

06/08/16

Shiplap Shelf

I love the look of shiplap and really wanted to add it to our master bedroom.  I also wanted a  shiplap shelf or an area to display pictures, frames, mirrors or what ever treasures I found that I loved.  You can see how I added shiplap to the walls for less than $50 in this post. I have to say, I am totally in love with the way it turned out!

shiplap-shelf

This is how I made the shelf on top of the shiplap. 

{this post contains affiliate links}

SUPPLIES:

  • 2 – 1″x2″x8′ pine boards
  • 3 -1″x8″x6′ pine boards
  • 2 – 1″x4″x8′ pine boards
  • Kreg Jig
  • Table saw
  • Tape measure
  • Cordless Drill
  • Screws

My wall is almost 14′ long so making one long shelf was not really an option.  I wanted to be somewhat seamless, without brackets holding it up, similar to a plate rail in an old home. 


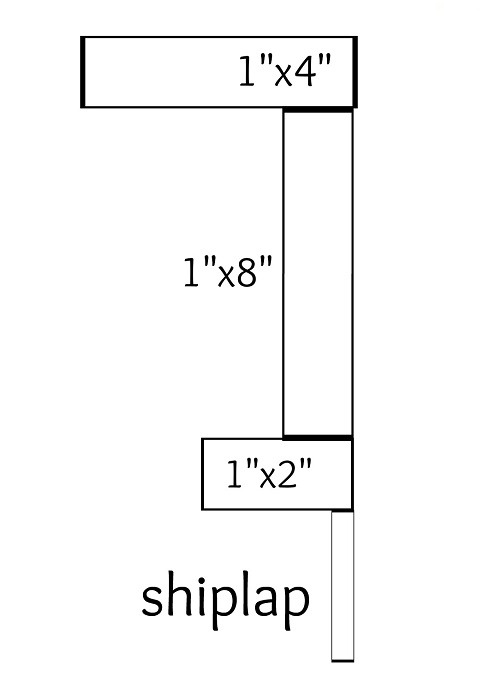
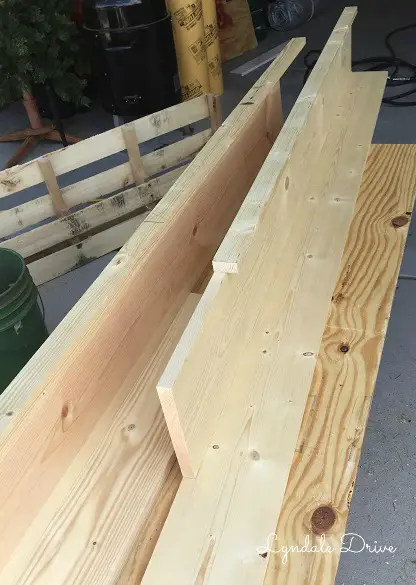
I started by trimming all the ends of the boards so they were square.  Actually Mike did this part, the table saw is too tall for me to use!  Below is the layout of the boards.

How-to-shelf

Next I cut all the boards to length, I staggered the cuts so I didn’t end up with one “seam” right in the middle making the shelf weak.  And I couldn’t get the 1″x8″s in 8′ lengths, so I had to get 3-6 footers.

This is how my boards were laid out, of course yours will be fit to your space.  We took it upstairs in two sections, the grey and the blue, then connected them one up in the room.

Shiplap-shelf-layout

I used the Kreg Jig on the 1″x8″ so I could attach the 1″x2″ to the bottom and 1″x4″ to the top. 


I am telling you, if you don’t have a Kreg Jig, you need to purchase one!  This thing is simple to use and makes for strong joints!  Here is a great tutorial on how the Kreg Pocket hole system works!

kreg-jig-shelf

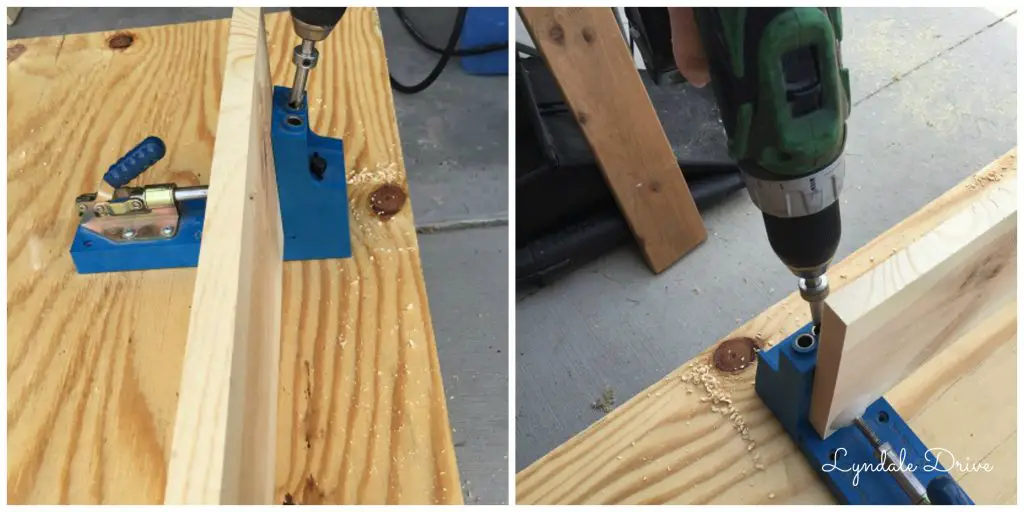
Once I had all my pocket holes drilled, I attached both the top an bottom boards to the center board using screws that are inserted into the pocket holes.  Once I had them in the room I attached both sections together.  The picture below shows the shelves (upside-down) before we took them up to the bedroom.

build-your-own-shelf

Again, I needed Mike to help with this, I couldn’t hold up a 14′ shelf and screw it to the wall without him.  I already had the studs marked from installing the shiplap, so we drilled the holes for the screws in the appropriate spots and screwed the shelf in place!

diy-shiplap-shelf

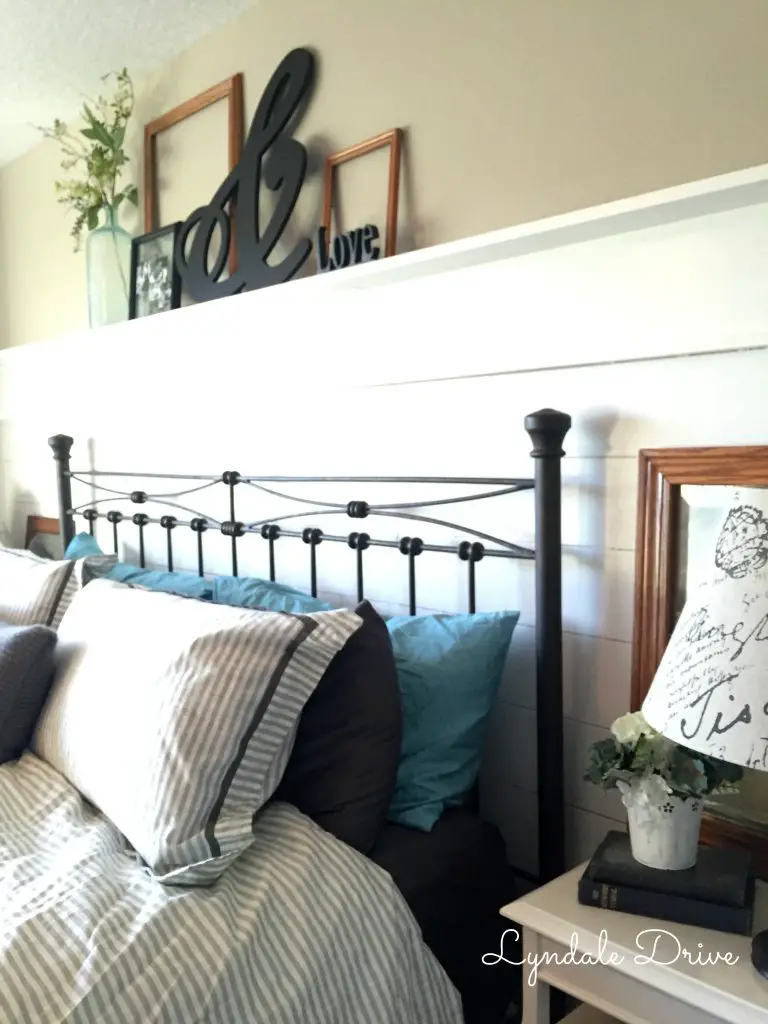
I squealed a little!!  Ok, maybe a lot!  This project turned out so good…….I am excited to get busy with the scrap pieces of shiplap on another project!

Signature LD

  • Tweet
  • Email
  • Print

1 Comment
DIY// Master

« Shiplap wall for less than $50
Chalk up another great weekend! »

Trackbacks

  1. How to make throw pillow covers the easy and inexpensive way says:
    September 26, 2016 at 7:41 pm

    […] love to change my throw pillows with the change of seasons.  I have them everywhere in our house, master bedroom, living room, mancave (Now named – Still #22), entryway, front porch, back […]

    Reply

Leave a Reply Cancel reply

Your email address will not be published. Required fields are marked *

This site uses Akismet to reduce spam. Learn how your comment data is processed.

Hello! I’m Jodi

I'm glad you're here! This is where I make my dreams of DIY projects, home renovations and crafty ideas become reality. {I am serious - I dream of these things} I hope you decide to stick around, and follow along as my husband Mike and I make these dreams a reality.

Never Miss Another Post

If you love what you see now and don't want to miss another post....Join Me! I promise I won't flood your email with junk, only a friendly reminder that I published a new post!

Categories

Archives

how-to-paint-faux-brick-concrete-walls
painting-your-garage-door-black
  • Home
  • About Me
  • Our Home
    • Master
      • Shiplap Shelf
      • How to keep your white sheets white
      • How to upcycle old sweaters into Christmas stockings
      • Dimming the light that shines in the night
      • Master bedroom night stands
      • Our Master “Pinterest” bedroom……
      • Shiplap wall for less than $50
    • Mancave
      • How to build a sliding barn door
      • The Dog’s House
      • A Shiplap Ceiling
      • Painting a Faux Brick Wall
      • Upcycle old frames….I’ll show you how!
      • A bi-fold door in disguise……….
      • A place to call his own……..kind of!
      • how i made industrial lights for the bar
    • Front Porch
      • Hydrangeas are in the air
      • Red, White and Gray-It’s almost Independence Day!
      • Say Hello
      • Holiday Home Tour (Part 1)
    • Kitchen
      • Upholstery 101
      • Harvest Table – Part one
      • Harvest Table – Part Two
      • Holiday Home Tour (Part 2)
      • How to organize a mini office space in your pantry
      • New Bling {Cabinet Hardware} for the Kitchen
      • Transform your dining room table
      • Trays, not just for carrying your lunch in grade school anymore!
    • Living Room
      • Designing a fireplace makeover
    • Garage
      • Got Paint?
  • DIY Projects
    • Painting/Crafts
      • DIY Poster Sized Word Art
      • Fresh Cut Tree Sign
      • Farmers Market….
    • Simple Sewing
      • Add your favorite recipe to a tea towel
      • How to upcycle old sweaters into Christmas stockings
      • Vintage Stockings for $3 or less
      • Upholstery 101
    • Trash to Treasure
      • How to paint on old screens
      • New life for an old brass fixture
    • Miscellaneous
      • How to keep your white sheets white
      • New Bling {Cabinet Hardware} for the Kitchen
    • Electircal
      • how i made industrial lights for the bar
    • Woodworking
      • How to build a sliding barn door
  • Contact Me
    • Disclosures

Copyright © 2022 · Dainty theme by Restored 316

Copyright © 2022 · Dainty Theme on Genesis Framework · WordPress · Log in

loading Cancel
Post was not sent - check your email addresses!
Email check failed, please try again
Sorry, your blog cannot share posts by email.