• Home
  • Meet Us
  • Our Home
    • Master
      • Shiplap Shelf
      • How to keep your white sheets white
      • How to upcycle old sweaters into Christmas stockings
      • Dimming the light that shines in the night
      • Master bedroom night stands
      • Our Master “Pinterest” bedroom……
      • Shiplap wall for less than $50
    • Mancave
      • How to build a sliding barn door
      • The Dog’s House
      • A Shiplap Ceiling
      • Painting a Faux Brick Wall
      • Upcycle old frames….I’ll show you how!
      • A bi-fold door in disguise……….
      • A place to call his own……..kind of!
      • how i made industrial lights for the bar
    • Front Porch
      • Hydrangeas are in the air
      • Red, White and Gray-It’s almost Independence Day!
      • Say Hello
      • Holiday Home Tour (Part 1)
    • Kitchen
      • Upholstery 101
      • Harvest Table – Part one
      • Harvest Table – Part Two
      • Holiday Home Tour (Part 2)
      • How to organize a mini office space in your pantry
      • New Bling {Cabinet Hardware} for the Kitchen
      • Transform your dining room table
      • Trays, not just for carrying your lunch in grade school anymore!
    • Living Room
      • Designing a fireplace makeover
    • Garage
      • Got Paint?
  • DIY Projects
    • Painting/Crafts
      • DIY Poster Sized Word Art
      • Fresh Cut Tree Sign
      • Farmers Market….
    • Simple Sewing
      • Add your favorite recipe to a tea towel
      • How to upcycle old sweaters into Christmas stockings
      • Vintage Stockings for $3 or less
      • Upholstery 101
    • Trash to Treasure
      • How to paint on old screens
      • New life for an old brass fixture
    • Miscellaneous
      • How to keep your white sheets white
      • New Bling {Cabinet Hardware} for the Kitchen
    • Electircal
      • how i made industrial lights for the bar
    • Woodworking
      • How to build a sliding barn door
  • Contact Me
    • Disclosures
    • Facebook
    • Instagram
    • Pinterest
    • Twitter

Lyndale Drive

06/14/18

Mirror Makeover

Hey everyone!  Sorry it has been so long between posts lately, but I am finding it difficult to post project updates when there is so much going on at the new house.  There are so many things going on over there that I want to share, but many of them are not complete.  This mirror makeover is at 90%, so I thought it would be ok to share now.

This entire project started because I had seen some old arched window frames on an antique store Facebook page.  Mike and I drove an hour and a half to the store to buy them and as usual, they looked better in the picture!  We decided we would make our own.

You may remember from our last mirror makeover I learned the hard way, (mirrors are expensive).  Not this time!  I bought two wicker framed mirrors off of a Facebook swap page for $20!  I didn’t care about the wicker frame, all I wanted was the arched mirror.

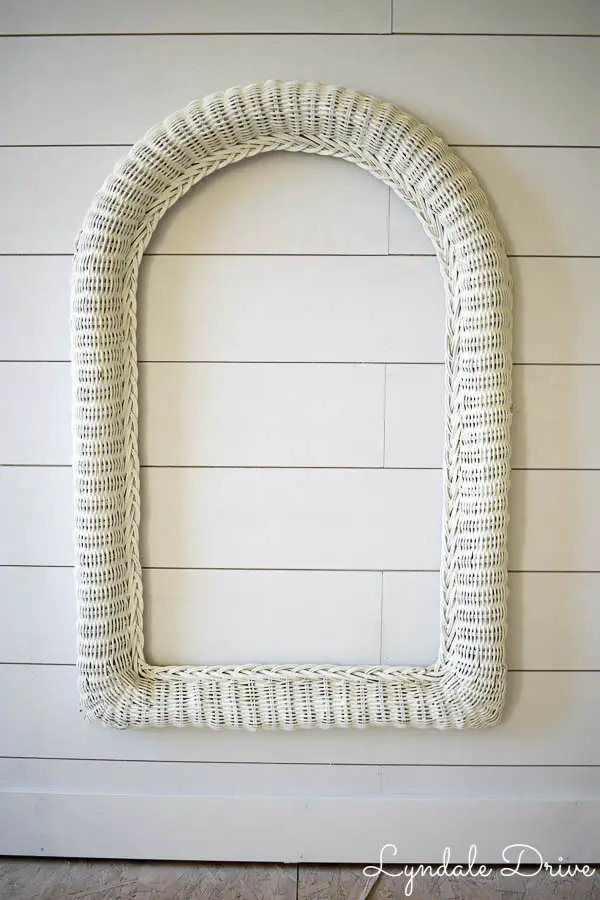
I was so excited to get this project started that I didn’t get a good picture of the wicker frames with mirrors, I am sure you get the idea!  This is what we started with and used as our pattern for the new frames.
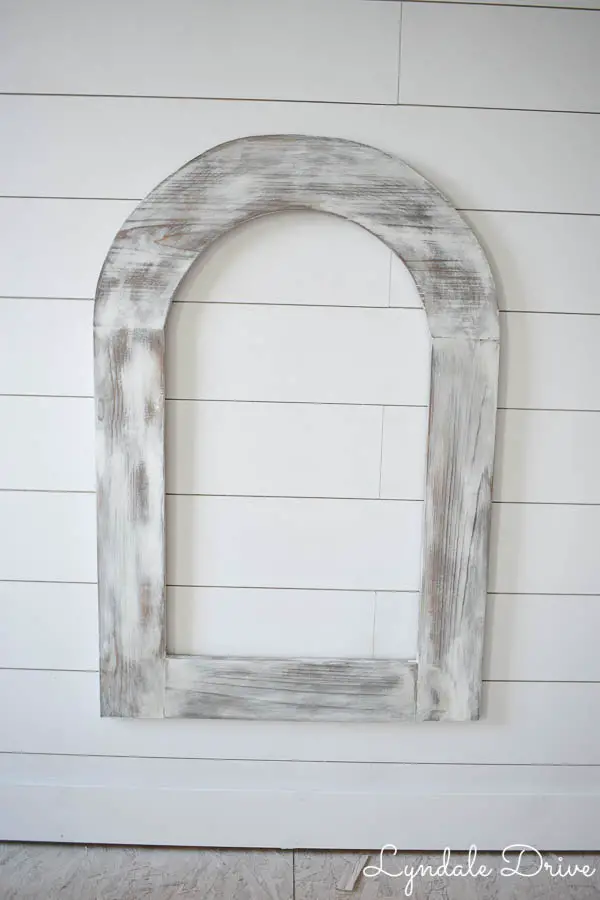
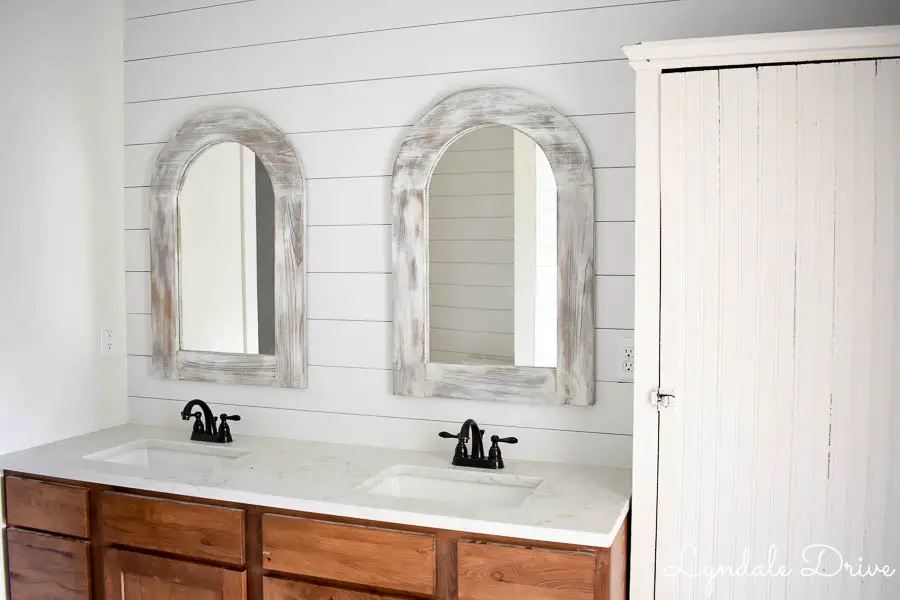
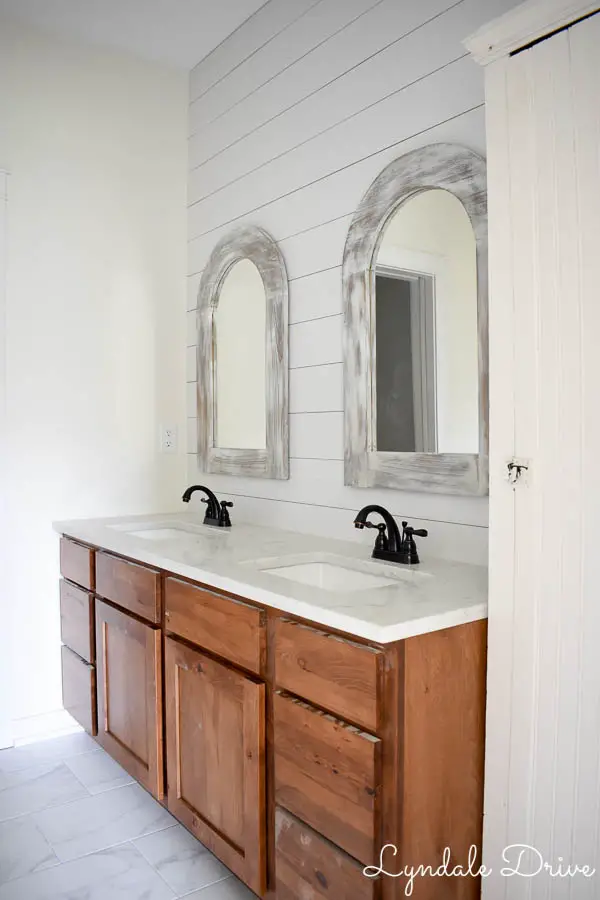
Mike made these frames using some pine wood scraps that we had laying around.  The top curved section was cut out of a 1×12, this allowed for enough room to cut the curve.  Next he measured and cut the sides and bottom using 1×4’s.  He joined to pieces together using the Kreg jig.  Next we used a router to make a groove on the back for the mirror to sit in.  (I didn’t take pictures of all these steps) it was really pretty simple.  Other than the fact that our mirrors were different sizes!  So we had to make some adjustments to the router grooves in the back so the frames are the same size!

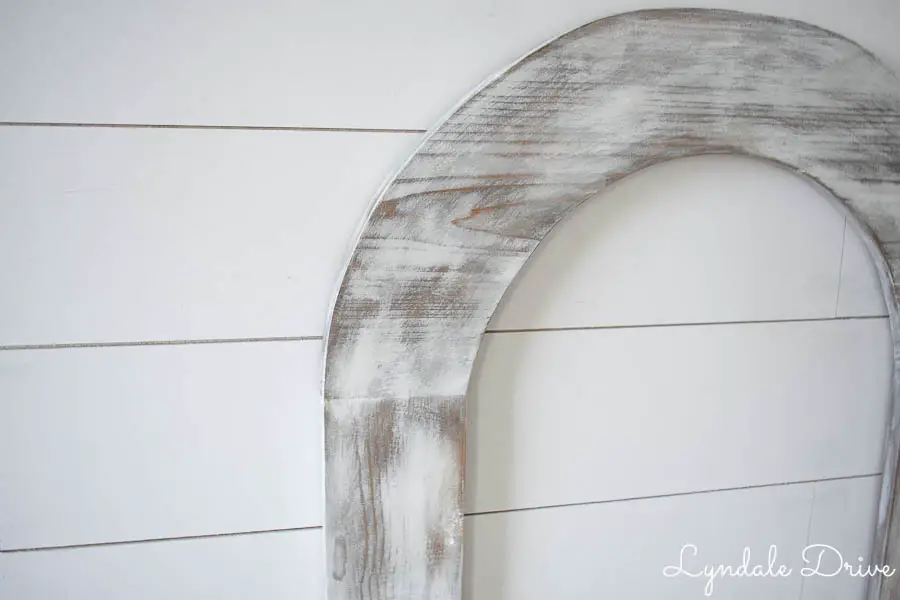
I really wanted these to look old, similar to the original window frames I found.  I applied several different ageing techniques to get the look I wanted.  This was the frustrating part.  I applied milk paint, chalk paint, stain and regular paint.  I painted, sanded, I stained, I sanded, I pained again, I sanded again.  I considered asking Mike to make me new frames so I could start over…….

Since I knew that wasn’t an option, I kept painting, sanding, painting, staining……  I wish I could tell you a simple process to apply in order to get this look.  Instead I guess I am here to tell this that this could be what you call a Pinterest fail?  However, I kept at it and ended up with a look I am happy with.

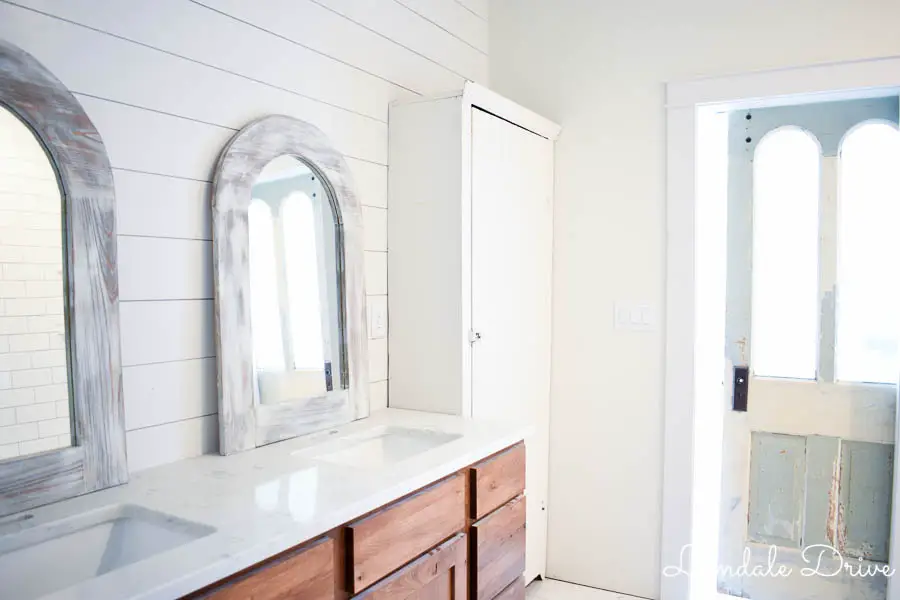
The lighting fixtures still need to be installed, once that happens, I will share more pics………..until then, you can enjoy this view.


Signature LD

  • Tweet
  • Email
  • Print

Leave a Comment
DIY// Master

« Finding Vintage Pictures
How I made our metal door look like wood »

Leave a Reply Cancel reply

Your email address will not be published. Required fields are marked *

This site uses Akismet to reduce spam. Learn how your comment data is processed.

Hello! I’m Jodi

I'm glad you're here! This is where I make my dreams of DIY projects, home renovations and crafty ideas become reality. {I am serious - I dream of these things} I hope you decide to stick around, and follow along as my husband Mike and I make these dreams a reality.

Never Miss Another Post

If you love what you see now and don't want to miss another post....Join Me! I promise I won't flood your email with junk, only a friendly reminder that I published a new post!

Categories

Archives

how-to-paint-faux-brick-concrete-walls
painting-your-garage-door-black
  • Home
  • Meet Us
  • Our Home
    • Master
      • Shiplap Shelf
      • How to keep your white sheets white
      • How to upcycle old sweaters into Christmas stockings
      • Dimming the light that shines in the night
      • Master bedroom night stands
      • Our Master “Pinterest” bedroom……
      • Shiplap wall for less than $50
    • Mancave
      • How to build a sliding barn door
      • The Dog’s House
      • A Shiplap Ceiling
      • Painting a Faux Brick Wall
      • Upcycle old frames….I’ll show you how!
      • A bi-fold door in disguise……….
      • A place to call his own……..kind of!
      • how i made industrial lights for the bar
    • Front Porch
      • Hydrangeas are in the air
      • Red, White and Gray-It’s almost Independence Day!
      • Say Hello
      • Holiday Home Tour (Part 1)
    • Kitchen
      • Upholstery 101
      • Harvest Table – Part one
      • Harvest Table – Part Two
      • Holiday Home Tour (Part 2)
      • How to organize a mini office space in your pantry
      • New Bling {Cabinet Hardware} for the Kitchen
      • Transform your dining room table
      • Trays, not just for carrying your lunch in grade school anymore!
    • Living Room
      • Designing a fireplace makeover
    • Garage
      • Got Paint?
  • DIY Projects
    • Painting/Crafts
      • DIY Poster Sized Word Art
      • Fresh Cut Tree Sign
      • Farmers Market….
    • Simple Sewing
      • Add your favorite recipe to a tea towel
      • How to upcycle old sweaters into Christmas stockings
      • Vintage Stockings for $3 or less
      • Upholstery 101
    • Trash to Treasure
      • How to paint on old screens
      • New life for an old brass fixture
    • Miscellaneous
      • How to keep your white sheets white
      • New Bling {Cabinet Hardware} for the Kitchen
    • Electircal
      • how i made industrial lights for the bar
    • Woodworking
      • How to build a sliding barn door
  • Contact Me
    • Disclosures

Copyright © 2021 · Dainty theme by Restored 316

loading Cancel
Post was not sent - check your email addresses!
Email check failed, please try again
Sorry, your blog cannot share posts by email.