• Home
  • Meet Us
  • Our Home
    • Master
      • Shiplap Shelf
      • How to keep your white sheets white
      • How to upcycle old sweaters into Christmas stockings
      • Dimming the light that shines in the night
      • Master bedroom night stands
      • Our Master “Pinterest” bedroom……
      • Shiplap wall for less than $50
    • Mancave
      • How to build a sliding barn door
      • The Dog’s House
      • A Shiplap Ceiling
      • Painting a Faux Brick Wall
      • Upcycle old frames….I’ll show you how!
      • A bi-fold door in disguise……….
      • A place to call his own……..kind of!
      • how i made industrial lights for the bar
    • Front Porch
      • Hydrangeas are in the air
      • Red, White and Gray-It’s almost Independence Day!
      • Say Hello
      • Holiday Home Tour (Part 1)
    • Kitchen
      • Upholstery 101
      • Harvest Table – Part one
      • Harvest Table – Part Two
      • Holiday Home Tour (Part 2)
      • How to organize a mini office space in your pantry
      • New Bling {Cabinet Hardware} for the Kitchen
      • Transform your dining room table
      • Trays, not just for carrying your lunch in grade school anymore!
    • Living Room
      • Designing a fireplace makeover
    • Garage
      • Got Paint?
  • DIY Projects
    • Painting/Crafts
      • DIY Poster Sized Word Art
      • Fresh Cut Tree Sign
      • Farmers Market….
    • Simple Sewing
      • Add your favorite recipe to a tea towel
      • How to upcycle old sweaters into Christmas stockings
      • Vintage Stockings for $3 or less
      • Upholstery 101
    • Trash to Treasure
      • How to paint on old screens
      • New life for an old brass fixture
    • Miscellaneous
      • How to keep your white sheets white
      • New Bling {Cabinet Hardware} for the Kitchen
    • Electircal
      • how i made industrial lights for the bar
    • Woodworking
      • How to build a sliding barn door
  • Contact Me
    • Disclosures
    • Facebook
    • Instagram
    • Pinterest
    • Twitter

Lyndale Drive

01/30/17

Upholstery 101

Does the idea of upholstering a piece of furniture scare you to death?  It really is not that scary and I will show you how and hopefully ease your fears enough to give you the confidence needed to try your hand at a project like this!

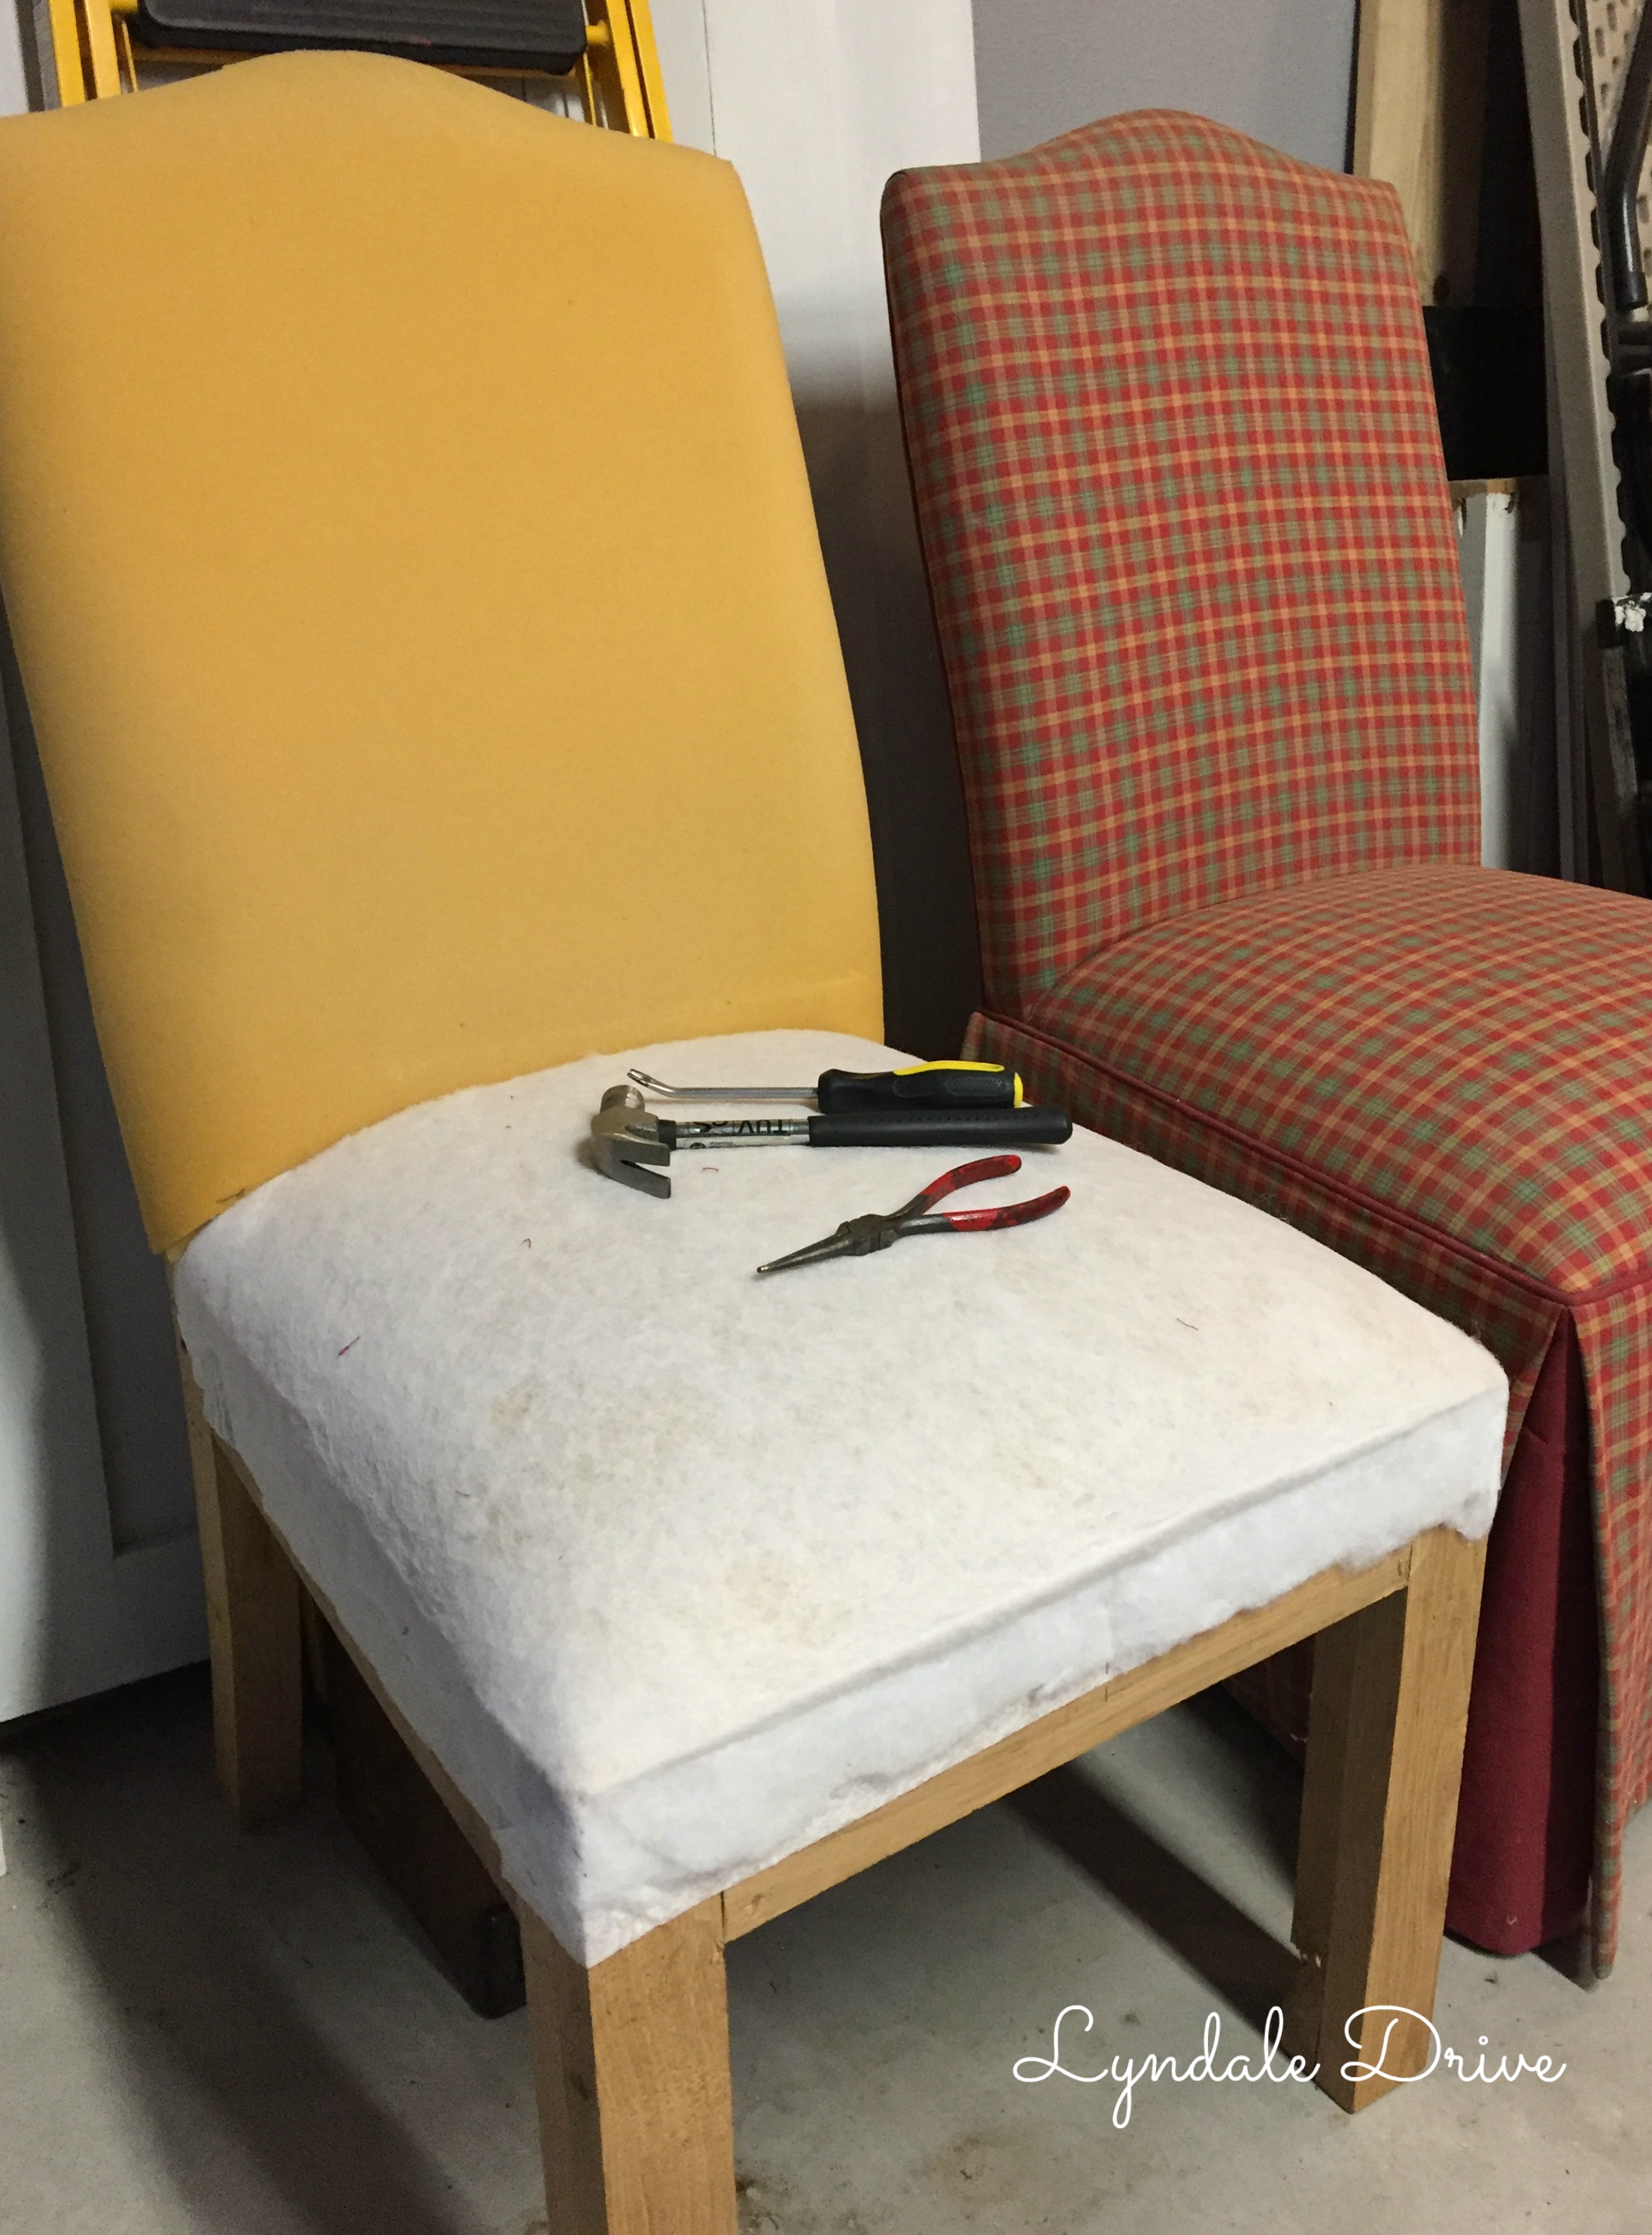
During one of my junking weekends I picked up these super UGLY chairs!Chair-makeover

You can read more about that adventure in this post  Junk Treasures, Making Crap Craptastic.  The red and green plaid upholstery and chair skirt covered in cat hair had to go.

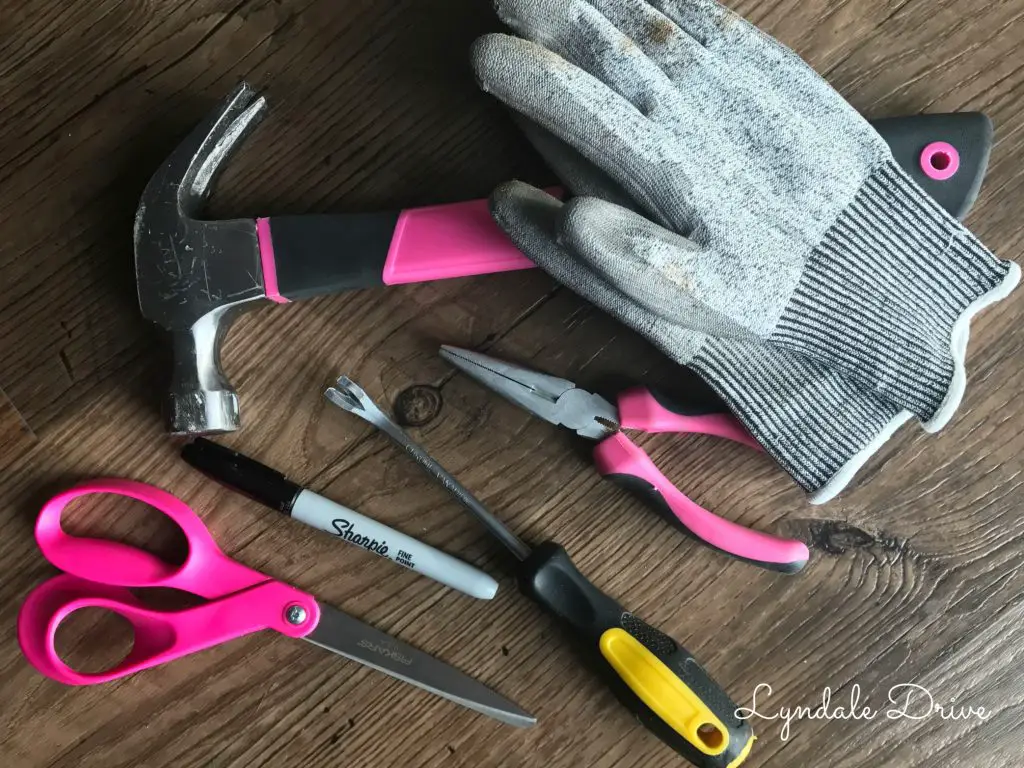
TOOLS NEEDED: (un-upholstery process)
Staple puller (for upholstery staples)
Hammer
Needle nose pliers
Scissors
Gloves – unless you like red, blistered hands
Sharpietools-needed-to-uhpolstery

Let me start by telling you, the worst part of any re-upholstery project is the prep.  I never did find a brand name on these chairs, but let me tell you, they are WELL BUILT and full of staples!!!  The manufacturer had NO intentions of this upholstery ever being removed.

staples
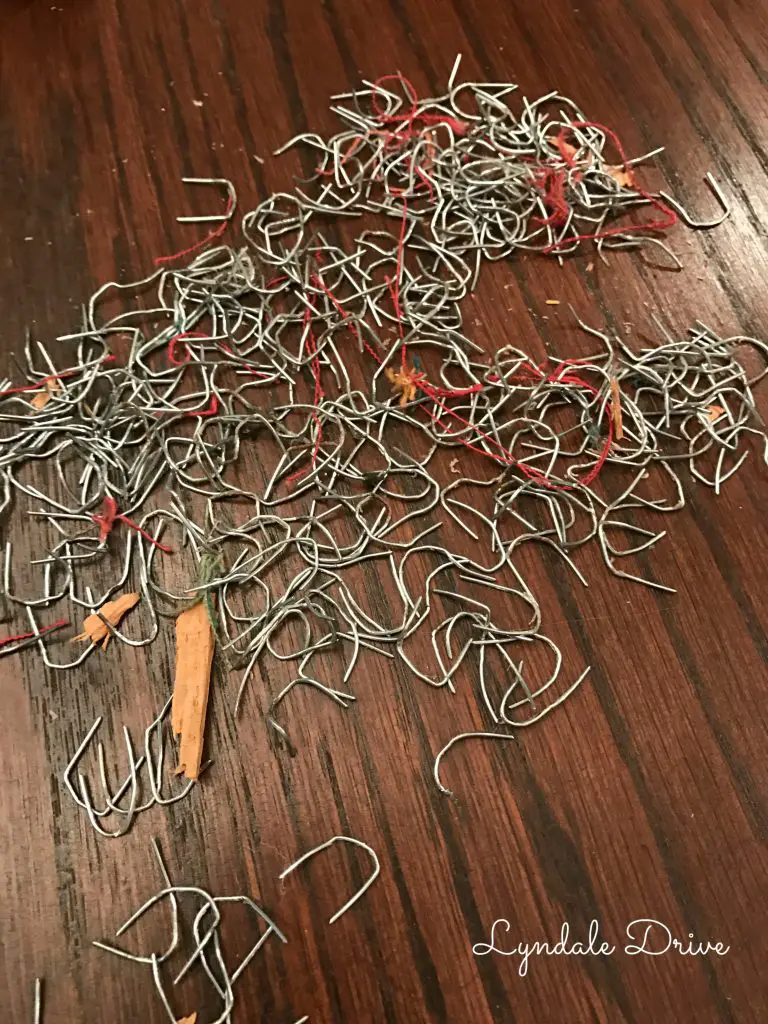
This picture represents the amount of staples I pulled from the seat of ONE chair.  Now take this picture x 1000 (not even exaggerating!!!).  THERE WERE MILLIONS OF STAPLES TO BE PULLED!!!  Oh my aching hands!!!

Removing Upholstery

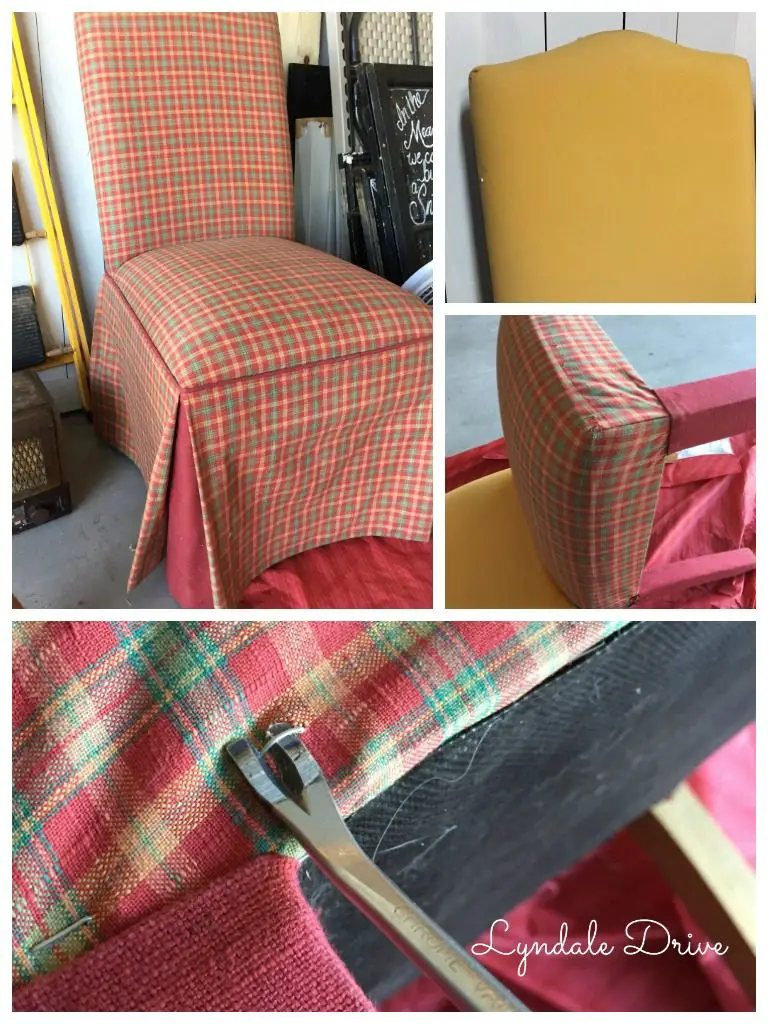
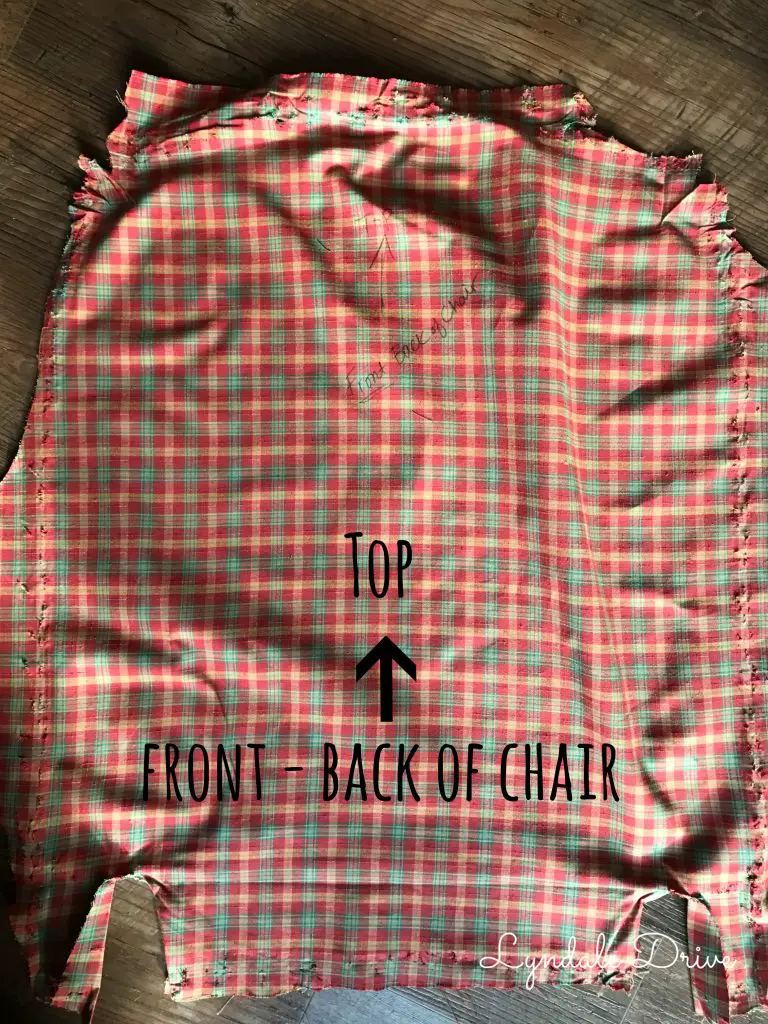
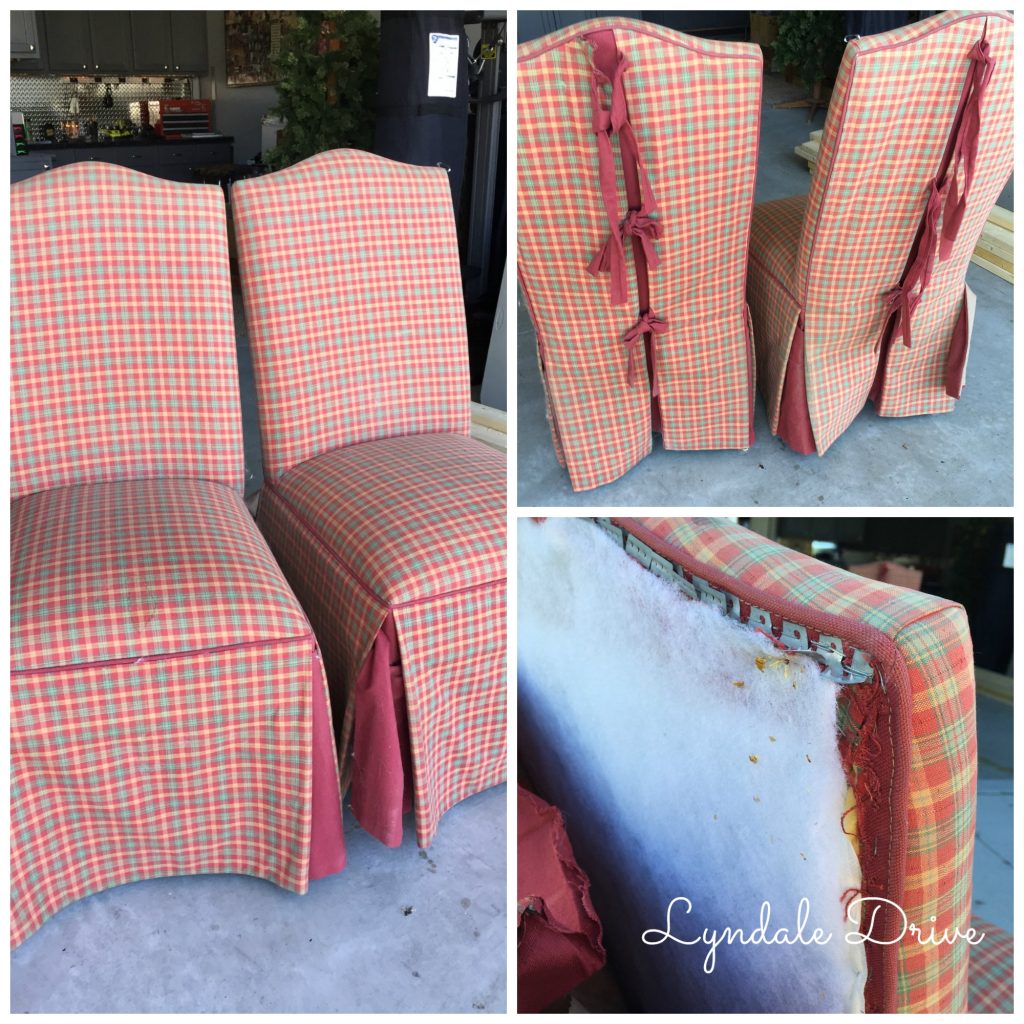
Step 1: I carefully removed a million and one staples from each chair (serious!)  When removing the staples, you want to be careful not to destroy the upholstery you are removing, you will use it as a pattern for your new upholstery.   My chairs had skirts, upholstered legs and bows on the back (which I didn’t keep) so I didn’t have to be so gentle with these areas.Uhphlstery-101Step 2: Using your sharpie, mark each piece of upholstery as you remove it with an identifier – I marked mine Seat, Front Back and Back and included arrows that point to the top or back of chair.  (see below – it’s hard to see my sharpie markings, so I added text to the picture so you ……….um, get the picture!)mark-removed-uhpolstery
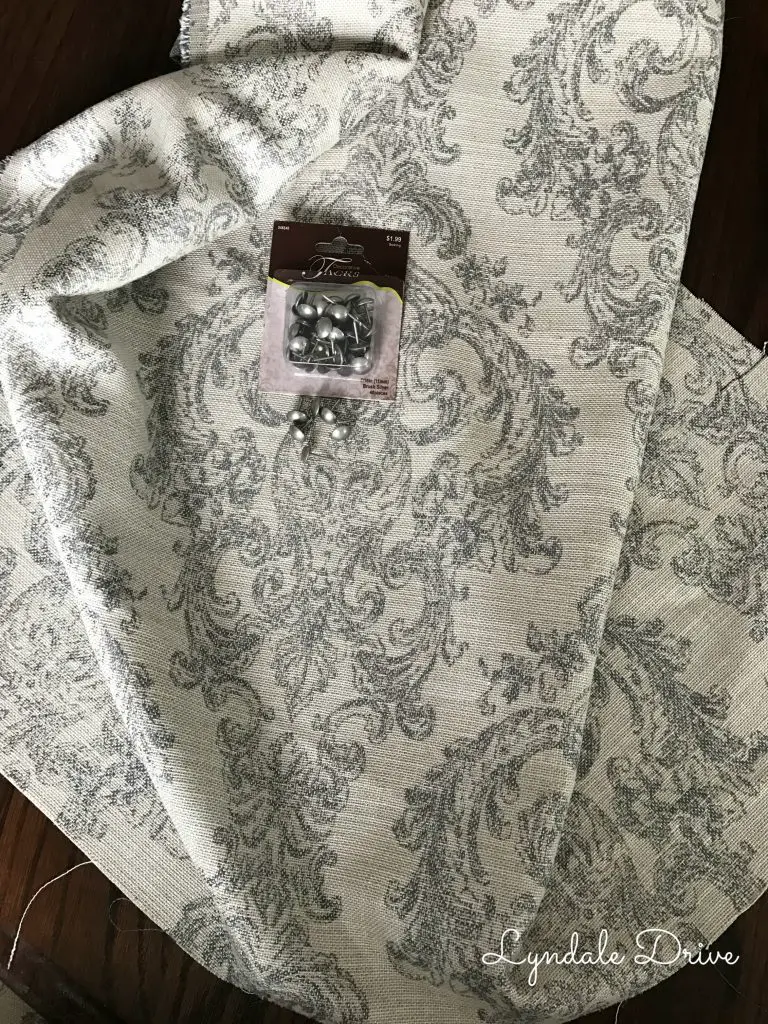
Step 3: Determine how much upholstery you need, I used 2 yards per chair.   If you need to, take your patterns with to determine the correct amount.  Keep an eye out for sales on upholstery fabric – it can get expensive.  I bought mine at Hobby Lobby and used their 40% off coupon!
NOTE: If you want to prevent yourself from a headache, choose a fabric without a pattern!!  Patterned fabrics will require more fabric and are somewhat of a pain to line up.  If you use a patterned fabric and don’t line it up, your project will look unprofessional!  

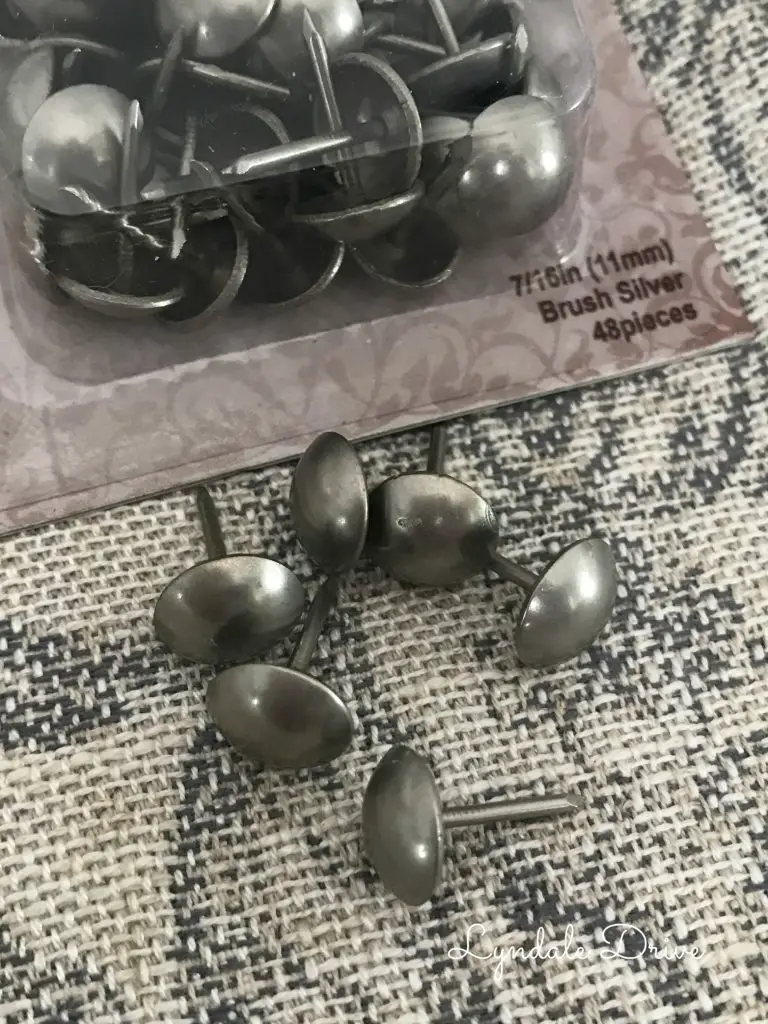
This is the fabric I chose along with the nail heads I will be adding.  What do you think?

dining-chair-fabric nail-headsStep 4: Cutting the upholstery – Stop here!!!  I will show you some tips and tricks in the next post.

Since I am going to expose the legs of my chairs that were previously covered,  I need to do some repairs – hopefully your project won’t require this step!  While I do that I need your help!!!  Here is a picture of my table and current chairs (you can read all about the table make over here) – the new chairs will replace the two end chairs…………….what color do I Paint or Stain the legs???
update-an-oak-tableI need your vote, so leave me a comment below:
A – Stain them the same color as the table top and Kitchen cabinets?
 – or –
B – Paint them the same color as the remaining chair legs, table base and trim in the house?


  • Tweet
  • Email
  • Print

7 Comments
DIY// Kitchen

« How to keep your white sheets white
New Bling {Cabinet Hardware} for the Kitchen »

Comments

  1. Samantha says

    January 30, 2017 at 7:54 am

    A

    Reply
  2. Glenda says

    January 30, 2017 at 12:20 pm

    I would stain them so you have a contrast with the light color fabric.

    Reply
  3. Kimberly Edwards says

    January 30, 2017 at 8:56 pm

    Stain them the same color of the table! Contrast will look great.

    Reply
  4. Marci says

    January 31, 2017 at 8:44 am

    At first, I thought white. Then decided stain would be fun with the contrast. You can’t go wrong either way!

    Great post, btw!

    Reply
  5. Lori says

    January 31, 2017 at 7:20 pm

    Stain since your fabric is lighter. Should really pop!

    Reply

Trackbacks

  1. Reupholstery - It's harder than you think! - Lyndale Drive says:
    March 5, 2017 at 8:14 pm

    […] Upholstery 101 […]

    Reply
  2. Simple makeover for an old piano bench says:
    June 1, 2017 at 9:21 am

    […] Upholstery 101 […]

    Reply

Leave a Reply Cancel reply

Your email address will not be published. Required fields are marked *

This site uses Akismet to reduce spam. Learn how your comment data is processed.

Hello! I’m Jodi

I'm glad you're here! This is where I make my dreams of DIY projects, home renovations and crafty ideas become reality. {I am serious - I dream of these things} I hope you decide to stick around, and follow along as my husband Mike and I make these dreams a reality.

Never Miss Another Post

If you love what you see now and don't want to miss another post....Join Me! I promise I won't flood your email with junk, only a friendly reminder that I published a new post!

Categories

Archives

how-to-paint-faux-brick-concrete-walls
painting-your-garage-door-black
  • Home
  • Meet Us
  • Our Home
    • Master
      • Shiplap Shelf
      • How to keep your white sheets white
      • How to upcycle old sweaters into Christmas stockings
      • Dimming the light that shines in the night
      • Master bedroom night stands
      • Our Master “Pinterest” bedroom……
      • Shiplap wall for less than $50
    • Mancave
      • How to build a sliding barn door
      • The Dog’s House
      • A Shiplap Ceiling
      • Painting a Faux Brick Wall
      • Upcycle old frames….I’ll show you how!
      • A bi-fold door in disguise……….
      • A place to call his own……..kind of!
      • how i made industrial lights for the bar
    • Front Porch
      • Hydrangeas are in the air
      • Red, White and Gray-It’s almost Independence Day!
      • Say Hello
      • Holiday Home Tour (Part 1)
    • Kitchen
      • Upholstery 101
      • Harvest Table – Part one
      • Harvest Table – Part Two
      • Holiday Home Tour (Part 2)
      • How to organize a mini office space in your pantry
      • New Bling {Cabinet Hardware} for the Kitchen
      • Transform your dining room table
      • Trays, not just for carrying your lunch in grade school anymore!
    • Living Room
      • Designing a fireplace makeover
    • Garage
      • Got Paint?
  • DIY Projects
    • Painting/Crafts
      • DIY Poster Sized Word Art
      • Fresh Cut Tree Sign
      • Farmers Market….
    • Simple Sewing
      • Add your favorite recipe to a tea towel
      • How to upcycle old sweaters into Christmas stockings
      • Vintage Stockings for $3 or less
      • Upholstery 101
    • Trash to Treasure
      • How to paint on old screens
      • New life for an old brass fixture
    • Miscellaneous
      • How to keep your white sheets white
      • New Bling {Cabinet Hardware} for the Kitchen
    • Electircal
      • how i made industrial lights for the bar
    • Woodworking
      • How to build a sliding barn door
  • Contact Me
    • Disclosures

Copyright © 2021 · Dainty theme by Restored 316

loading Cancel
Post was not sent - check your email addresses!
Email check failed, please try again
Sorry, your blog cannot share posts by email.