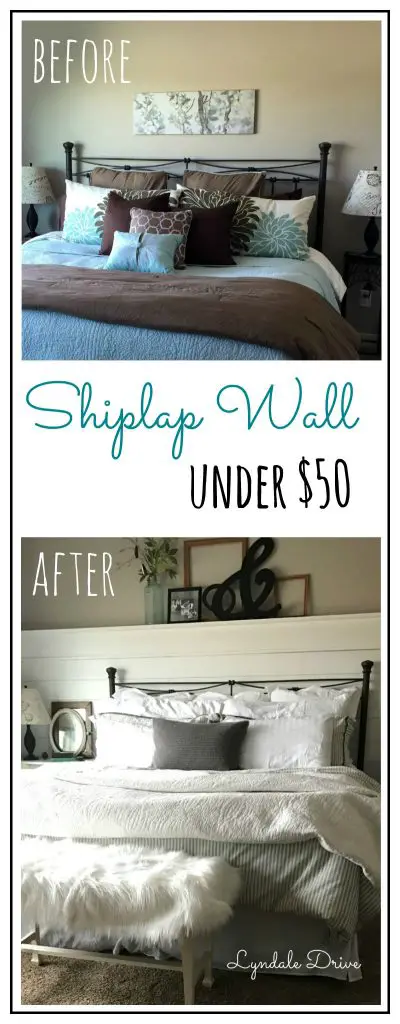
Shiplap Wall For Less Than $50
Do you dream of Chip and Joanna, demo day and shiplap? I do! I have to say, our old home had the real deal in it and we covered it up (Joanna would have been so disappointed in me!) Well, not anymore! I found a way to add shiplap to our master bedroom for less than $50!
Disclosure: As an Amazon affiliate, I earn from qualifying purchases at no extra cost to you. My blog contains other affiliate links as well for your convenience. To learn more, you may read my Disclosure Policy. Thank you for supporting my blog!
Mike went to work, so I got in his tool box! Here is how I added shiplap to our master bedroom wall for less than $50!
SUPPLIES:
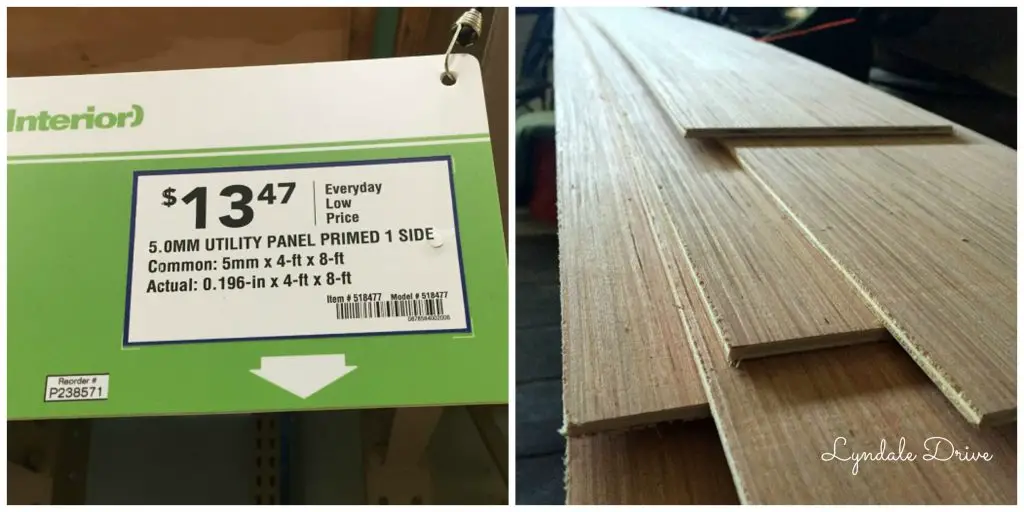
- 3 – 5.0mm 4’x8′ Utility Panels cut into 6 inch strips
- Pencil
- Tape Measure
- Painters Tape
- Sand Paper
- Straight Pins
- Hammer
- Level
- Air Gun & Nails
- Chop Saw
- Screw Driver
- Drill
- Jig Saw
- Quarters
I bought 3 – 5.0mm Utility panels for $13.47 ea at Lowe’s. Then I found Dave (a Lowe’s employee), he cut the panels into 6″ strips for me! I ended up with 7 – 6″ boards per sheet and a scrap piece – I will use it for another project!
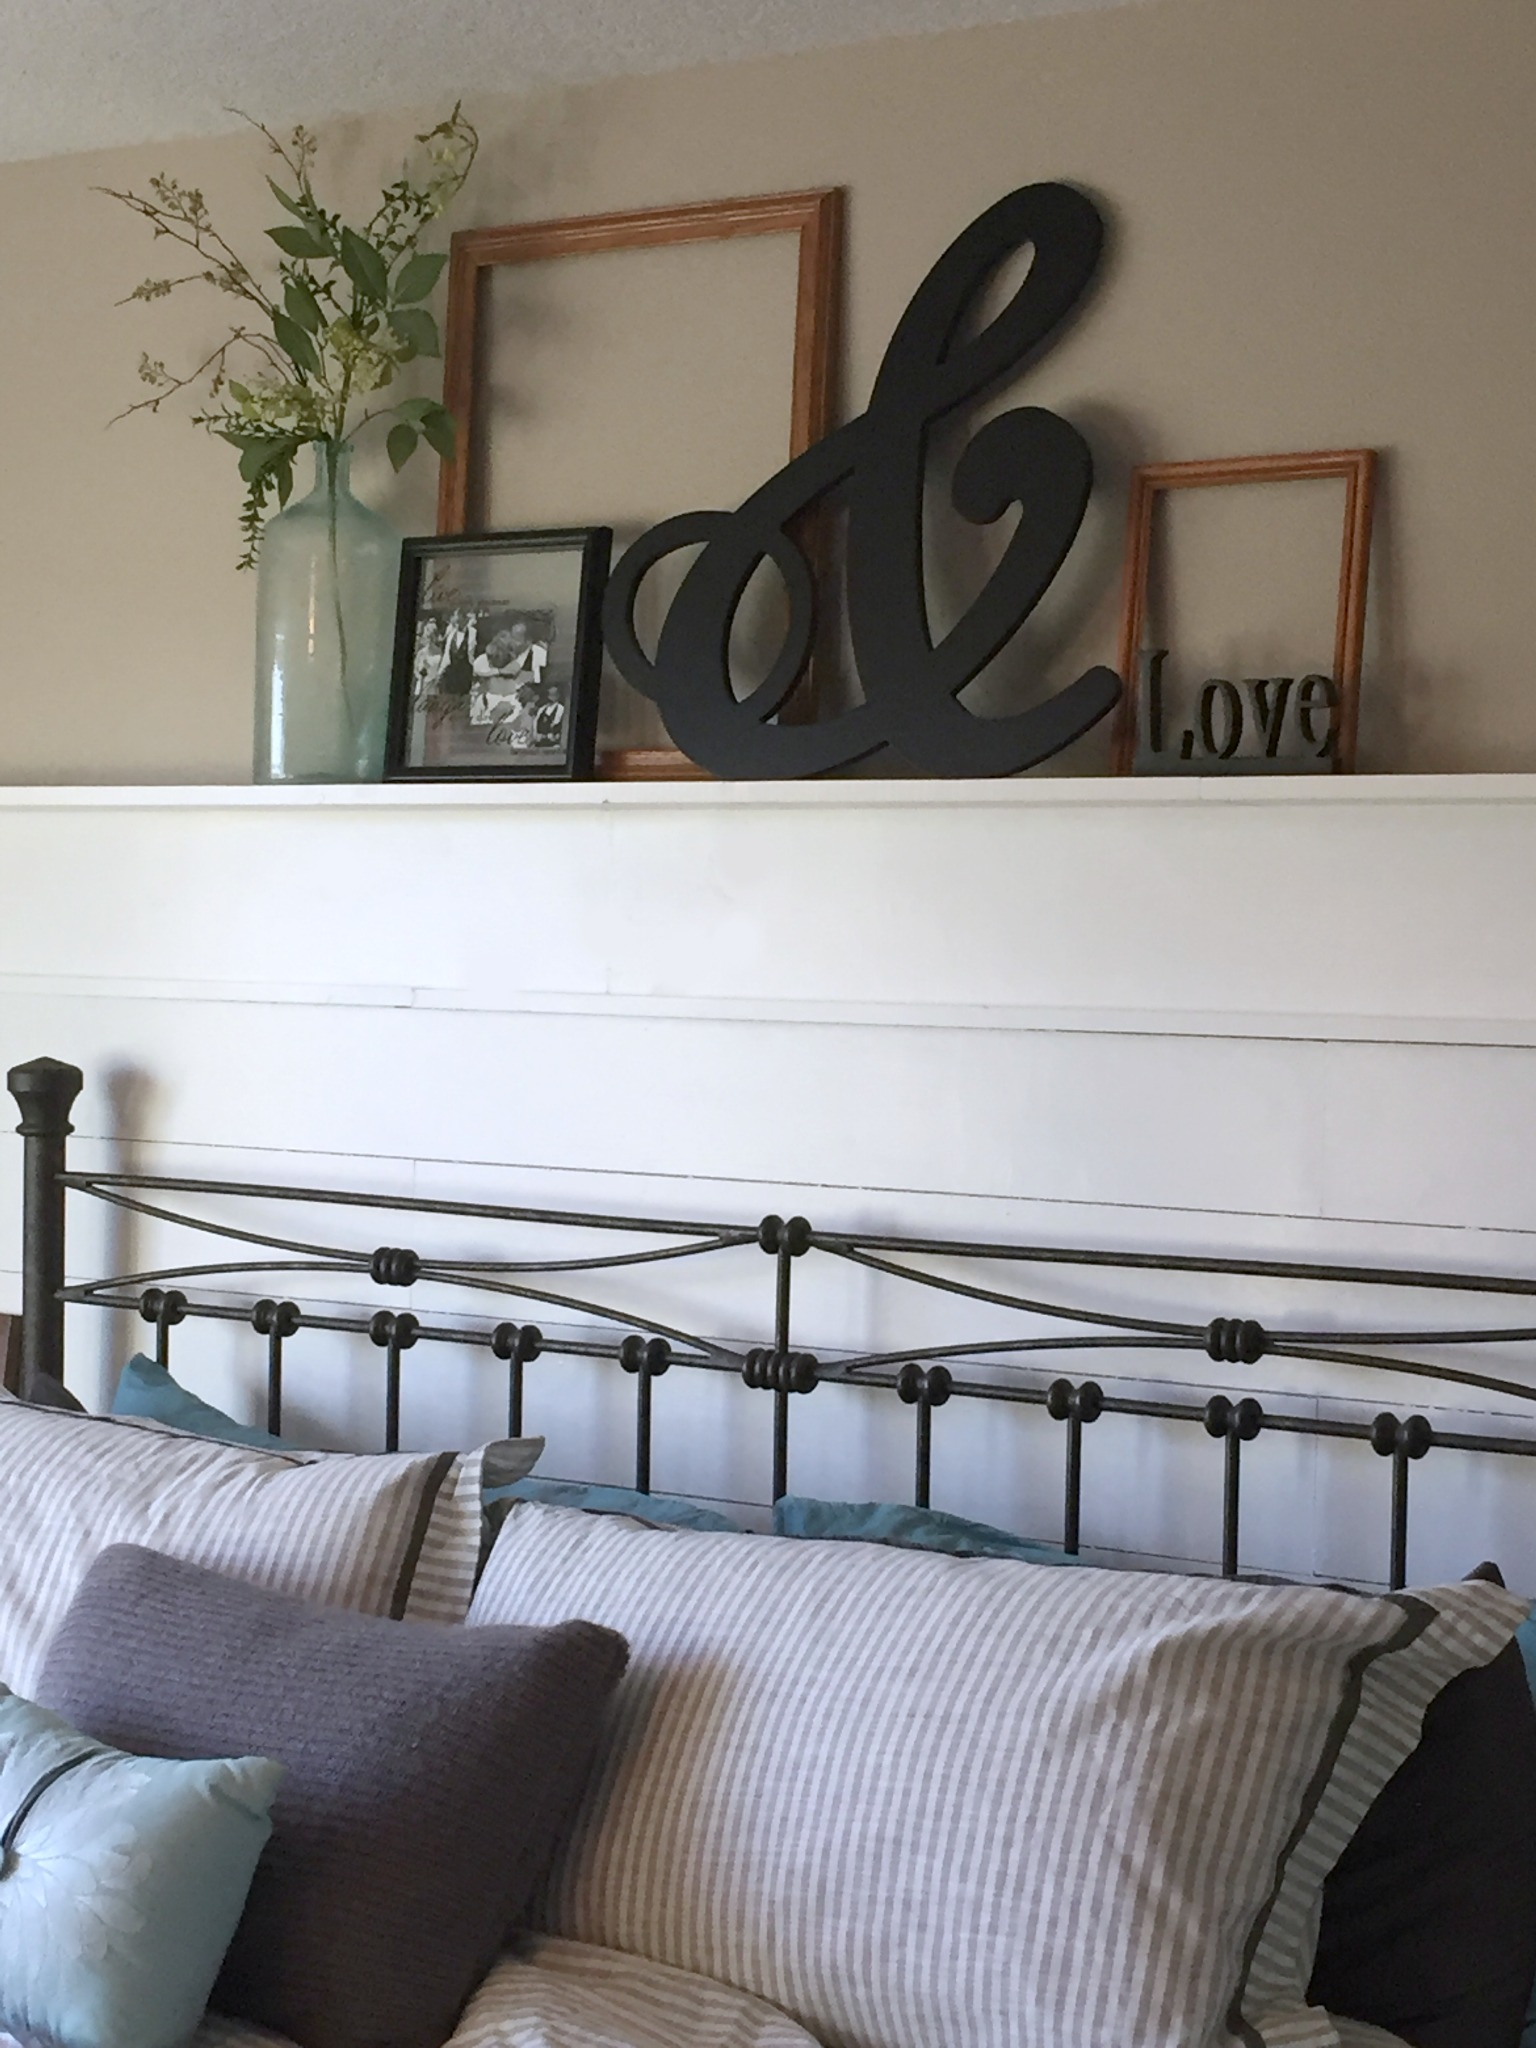
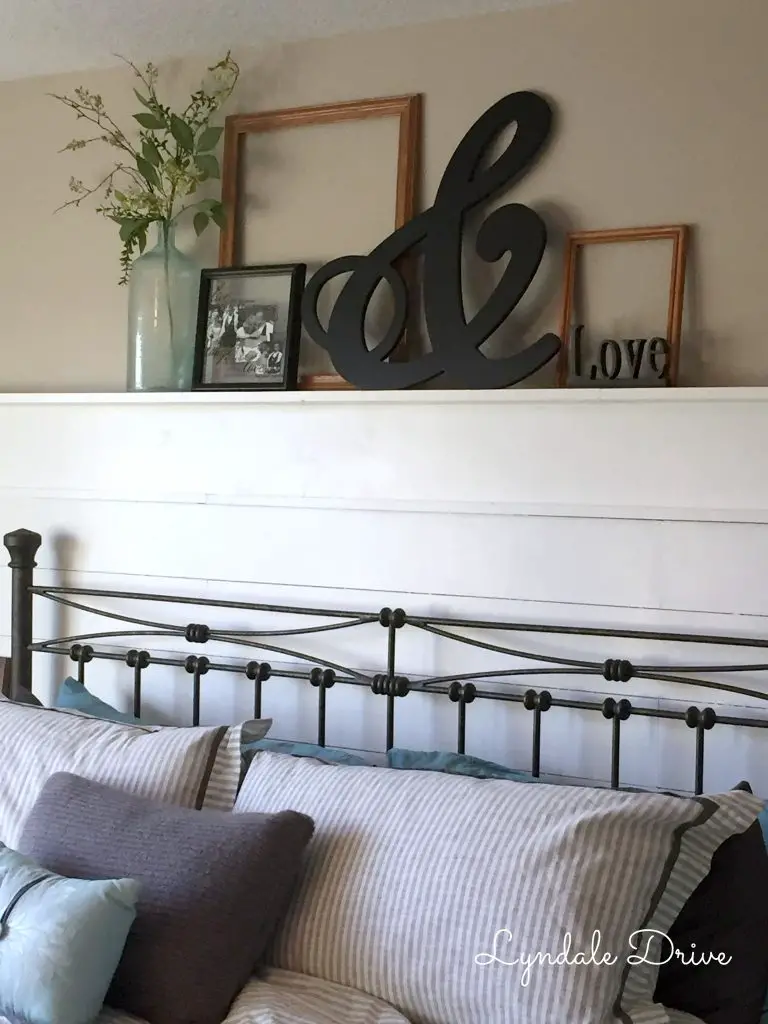
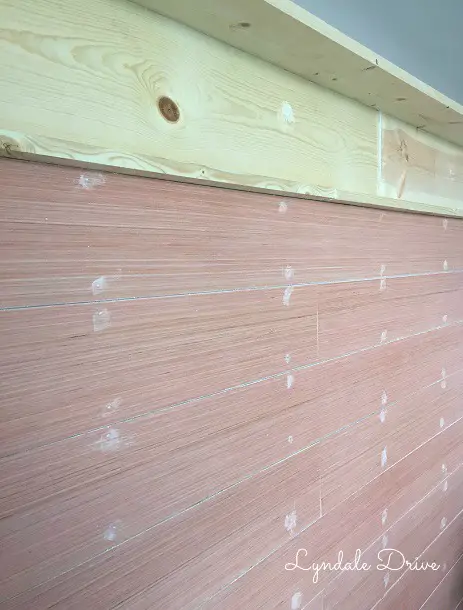
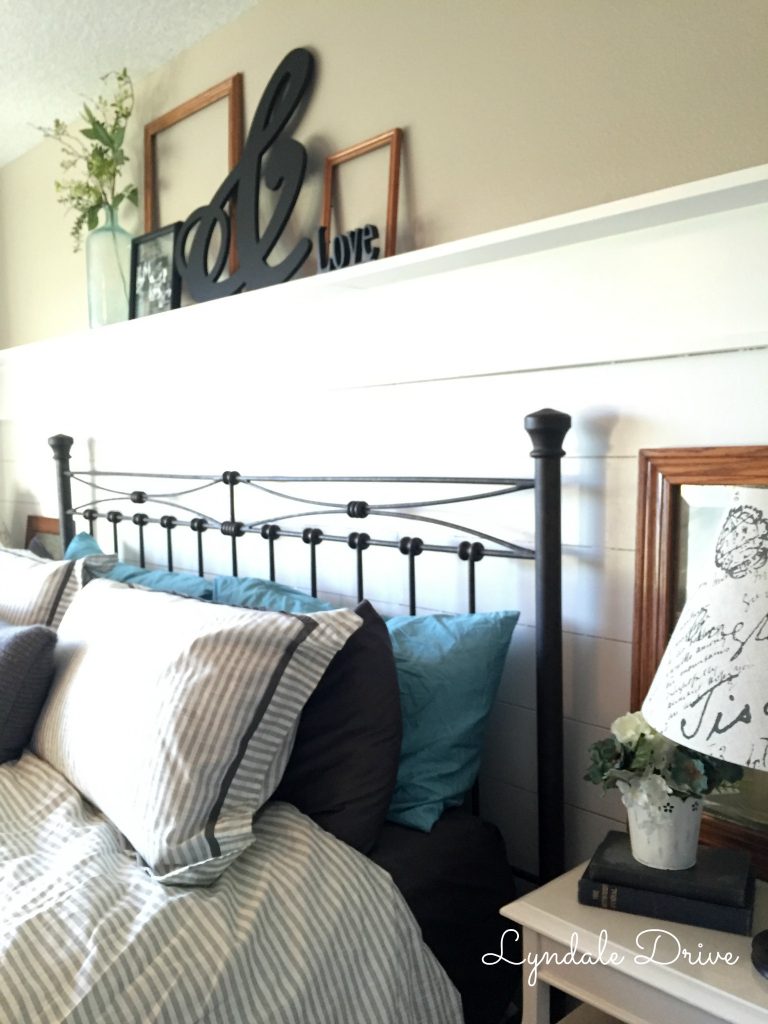
I sanded the edges, they were a little rough from the saw cuts. Although, I didn’t want them perfect, if you have ever seen true shiplap, it isn’t perfect! I didn’t want my shiplap to go all the way to the ceiling because I wanted to add a shelf above the bed.

Let’s Be Friends
Join the Lyndale Drive Community!
Sign up to receive all the latest blog details, tips & tricks and a whole lot of fun!
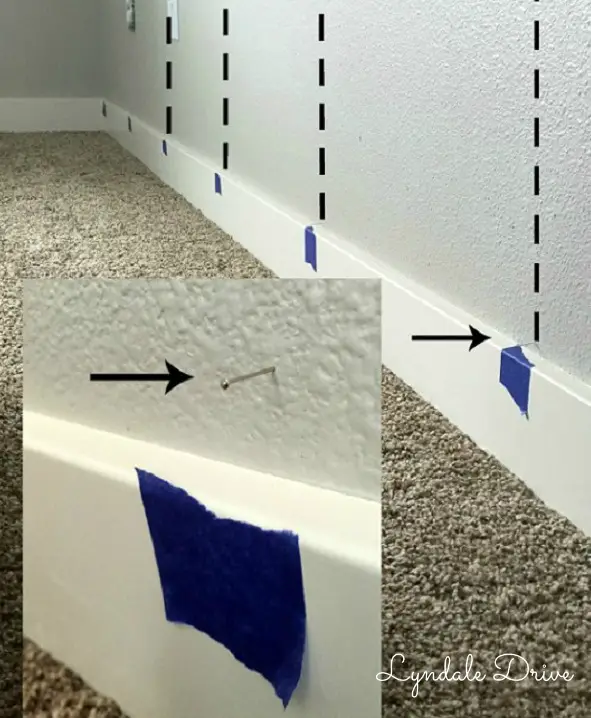
First I located the studs and marked the wall accordingly. Let me tell you, Mike has a fancy stud finder, but I have better luck with this trick!
I start with a straight pin, painters tape and a measuring tape. wow – I need a manicure!
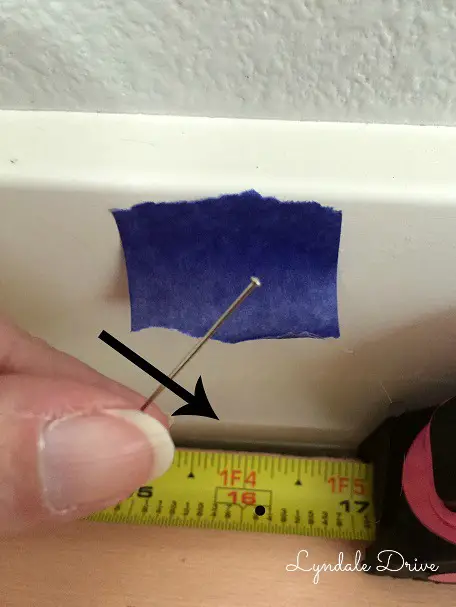
I started by measuring 16″ from the outside wall (not all walls are 16″ on center) then I take my painters tape and place it on the wall where I “think” the stud is located. Next I take my straight pin and a hammer and lightly tap the pin into the drywall, you will feel it as it goes through the drywall and when it hits a stud. The pin will usually begin to bend when you hit one, if you have missed the stud, the straight pin will all the sudden tap all the way in easily. The best part with this method is, if you miss the stud, the straight pin leaves a tiny hole and you never see it! I continue to measure every 16″ and mark the studs with a straight pin. Next I used a level to mark the stud lines from top to bottom. This will allow me to easily find the stud lines when I begin to nail up the shiplap. Easy Peasy! Who needs a stud finder when you know this trick! (note: I didn’t really make those black dotted lines on the wall – only a visual for you)
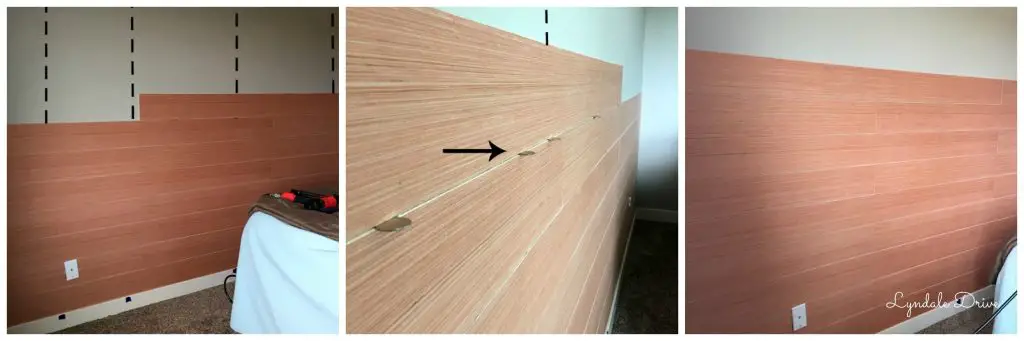
I started with my first plank that was 8′ long and nailed it to the wall using the trim as my guide. Then I measured and cut the next piece to fit using my chop saw.
On the second row, I started at the opposite end with my 8′ plank and I staggered the planks every other row until I reached the desired height (remember, I didn’t go all the way to the top). I used a quarter to determine the amount of space between each plank. TIP – have lots of quarters on hand……….they never stay in the gap and they tend to roll away!
The second row of shiplap had both outlets and the phone jack that needed to be cut out of the shiplap planks. Once I determined where I needed to cut them out, I marked the shiplap and used a drill to make a starter hole and then used the jig saw to cut out the holes. (I only had to cut them once I might add!)

Grab my free Guide
Discovering Your Style, Love Your Home
Decorating your home and discovering your style doesn’t have to be difficult. This guide will help you to create a home using some simple design tips that will make your house feel more like a home. A place you love to be.
You could continue to the ceiling but I wanted to add a shelf so I stopped just above the top of where my headboard will go.
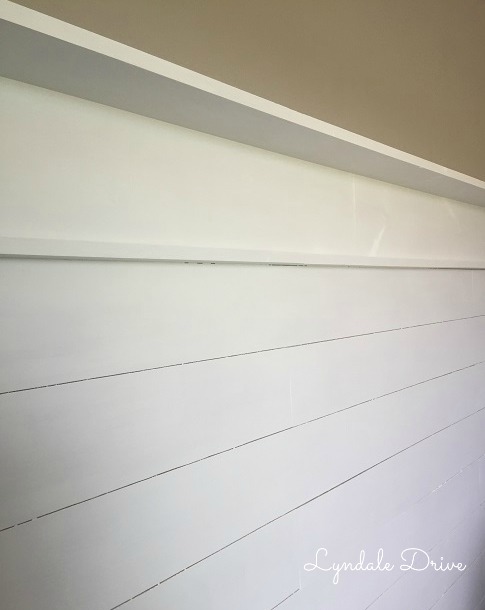
I then filled all the nail holes and painted. I didn’t paint the wall behind the shiplap or the edges of the shiplap. I didn’t want it all perfect, remember, actual ship lap is far from perfect.
I have to say, I think I am in love with the way this project turned out. Mike was totally impressed with my skills and secretly I think he was happy that he didn’t have to help me!
You may also enjoy these related articles:
- New Life For an Old Brass Fixture
- Decorating a Mantel for Fall on a Budget
- White Paint Colors, Choosing Them is Not Easy
Did you enjoy this article? Want to hear more? Stay in touch! Sign up below to receive design tips and tricks for your home.

I love the shelf above the shiplap. Great idea!
I will post a “how to” for that too! Stay tuned!
Love your blog, Jodi!
I really like your newly decorated bedroom. The shelf above the headboard is perfect. Keep the creative juices flowing.
Love it, Jodi!!!
Your bedroom is super cute!!!!
Thanks Abby – I am excited to start seeing your blog posts!!!
Thanks Chrystal!! I haven’t forgotten about your space!
Thanks Lynette.
Thanks Darlene – Mike says my creative brain never shuts off!
Ya did good girl!