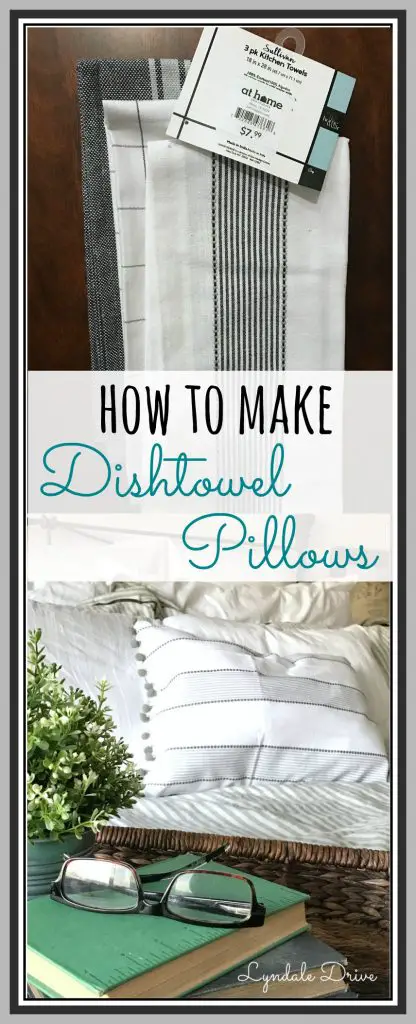
• Home
  • About Me
  • Our Home
    • Master
      • Shiplap Shelf
      • How to keep your white sheets white
      • How to upcycle old sweaters into Christmas stockings
      • Dimming the light that shines in the night
      • Master bedroom night stands
      • Our Master “Pinterest” bedroom……
      • Shiplap wall for less than $50
    • Mancave
      • How to build a sliding barn door
      • The Dog’s House
      • A Shiplap Ceiling
      • Painting a Faux Brick Wall
      • Upcycle old frames….I’ll show you how!
      • A bi-fold door in disguise……….
      • A place to call his own……..kind of!
      • how i made industrial lights for the bar
    • Front Porch
      • Hydrangeas are in the air
      • Red, White and Gray-It’s almost Independence Day!
      • Say Hello
      • Holiday Home Tour (Part 1)
    • Kitchen
      • Upholstery 101
      • Harvest Table – Part one
      • Harvest Table – Part Two
      • Holiday Home Tour (Part 2)
      • How to organize a mini office space in your pantry
      • New Bling {Cabinet Hardware} for the Kitchen
      • Transform your dining room table
      • Trays, not just for carrying your lunch in grade school anymore!
    • Living Room
      • Designing a fireplace makeover
    • Garage
      • Got Paint?
  • DIY Projects
    • Painting/Crafts
      • DIY Poster Sized Word Art
      • Fresh Cut Tree Sign
      • Farmers Market….
    • Simple Sewing
      • Add your favorite recipe to a tea towel
      • How to upcycle old sweaters into Christmas stockings
      • Vintage Stockings for $3 or less
      • Upholstery 101
    • Trash to Treasure
      • How to paint on old screens
      • New life for an old brass fixture
    • Miscellaneous
      • How to keep your white sheets white
      • New Bling {Cabinet Hardware} for the Kitchen
    • Electircal
      • how i made industrial lights for the bar
    • Woodworking
      • How to build a sliding barn door
  • Contact Me
    • Disclosures
    • Facebook
    • Instagram
    • Pinterest
    • Twitter

Lyndale Drive

03/02/17

Dish Towel Pillows

Today I am going to show you how to make dish towel pillows.  A fun, inexpensive way to update any room or space using dish towels!   Yup, you heard that right, dish towels!!!  Dish towels come in 1000’s of patterns, textures and colors providing the best fabric for fun and inexpensive throw pillows.

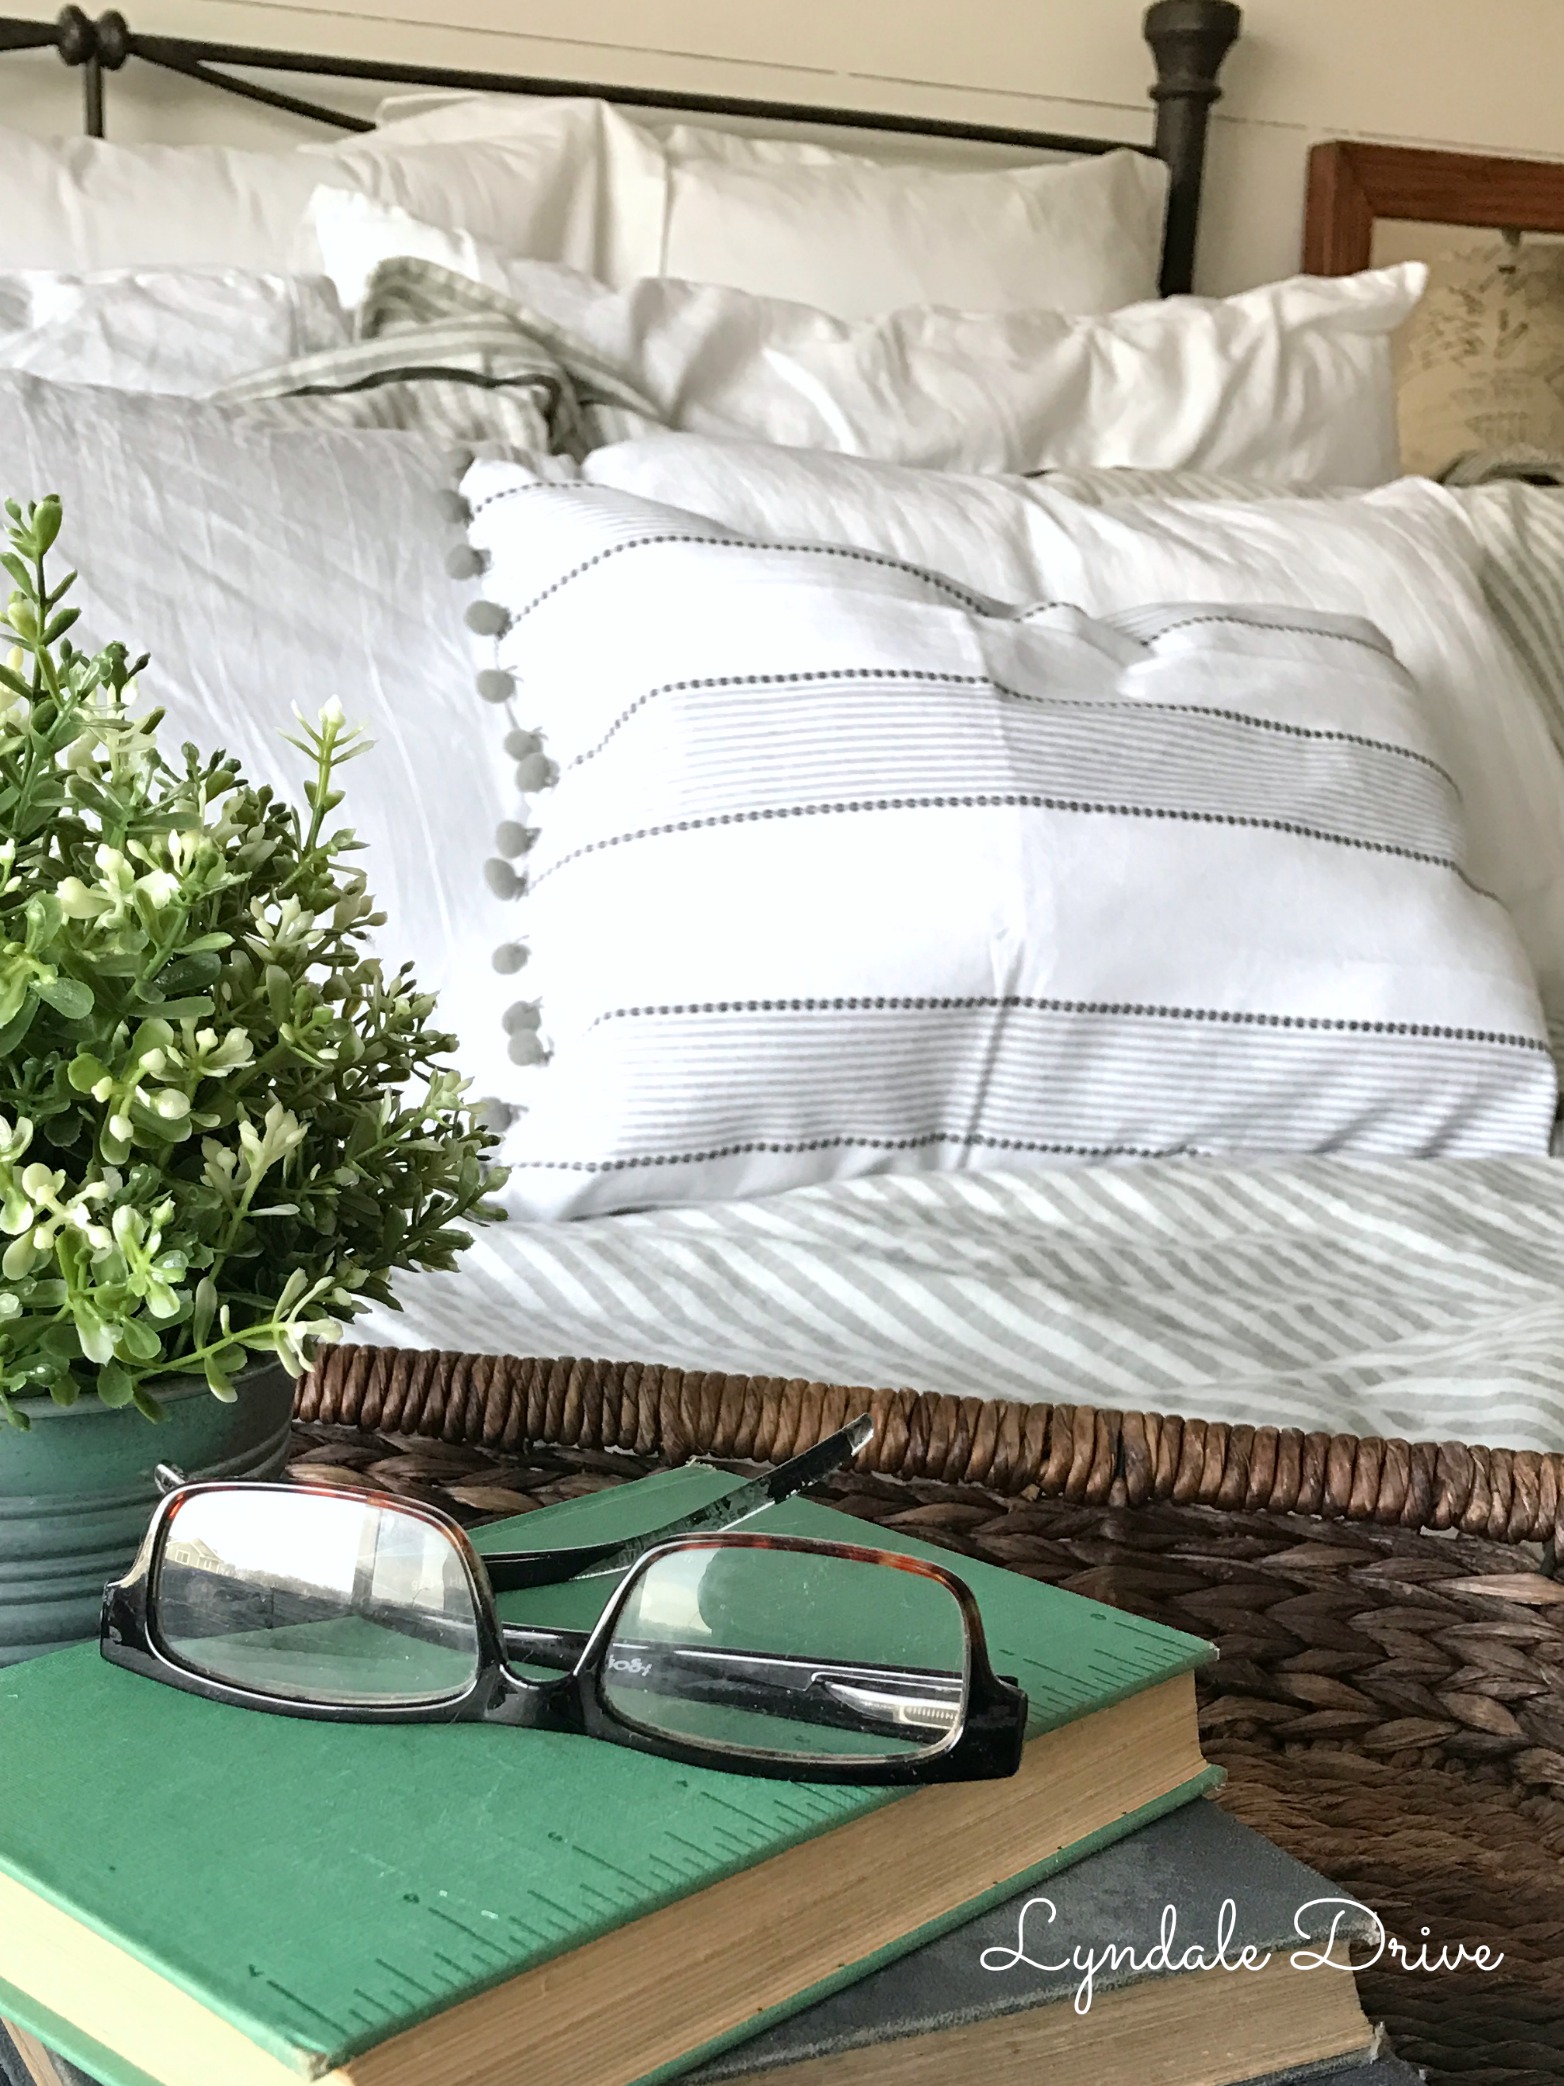
Remember when I went on my junking weekend with my friend Tabetha?  I shared with you how I love finding feather pillows at second hand stores for pennies!! (Well – more like $1.99) I tear away the outside covers (usually well loved and ugly) and use the insert for pillows that I make covers for.  See how to make pillow covers here.
inspiration-pillow

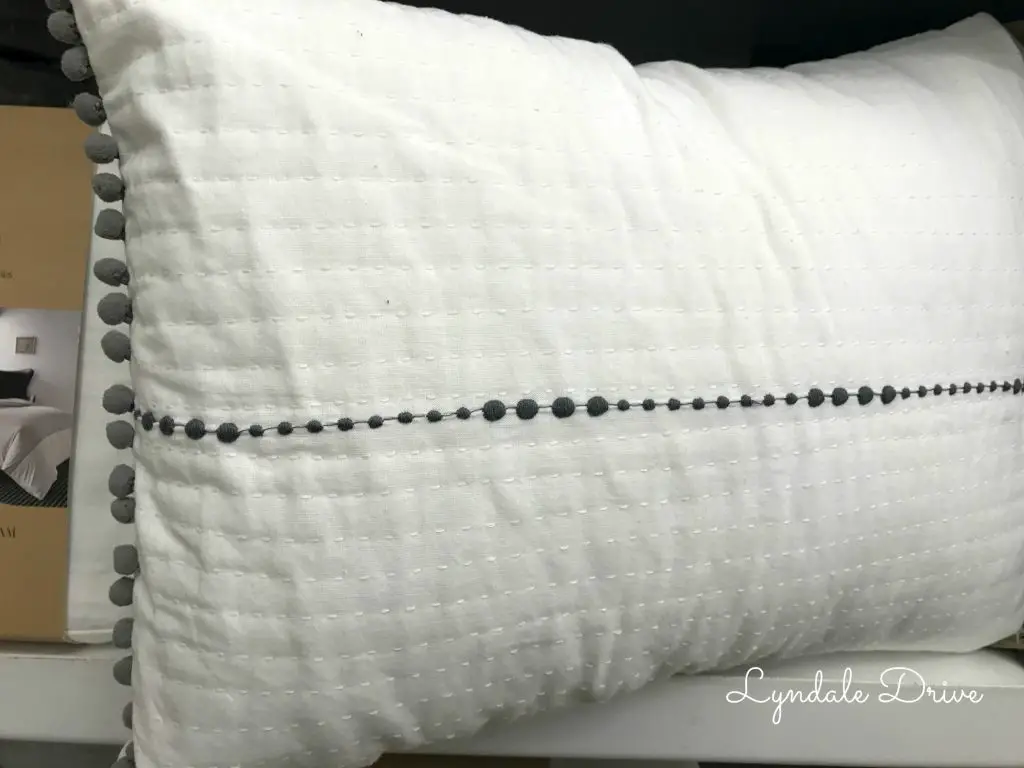
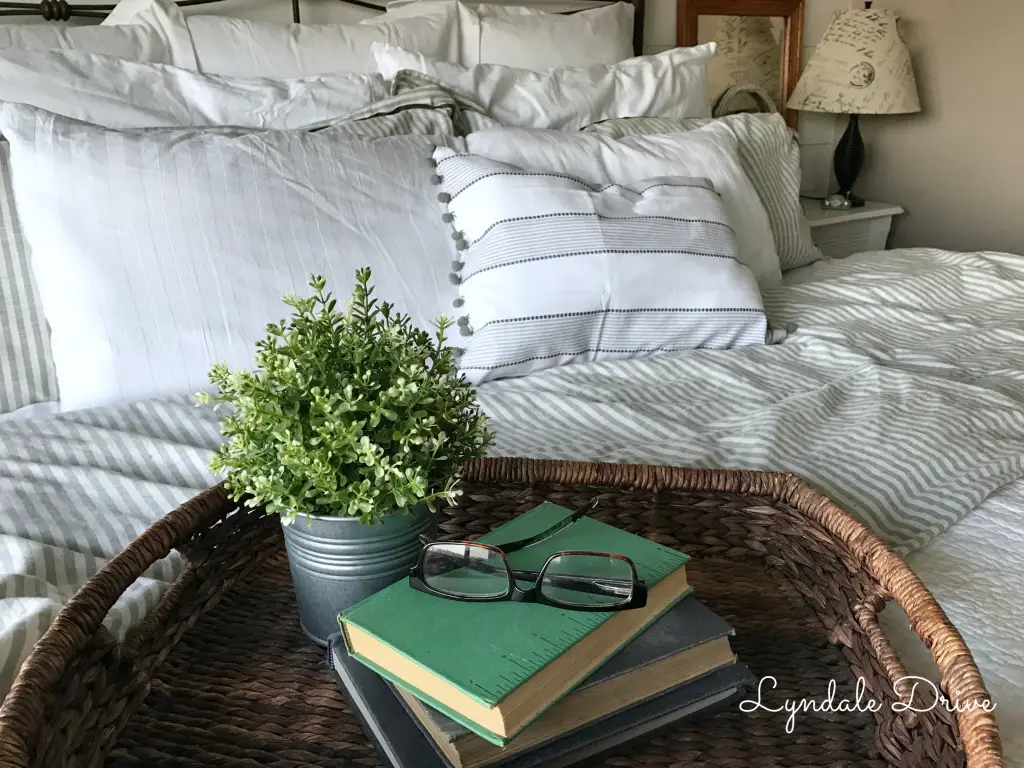
I found this adorable little pillow at BBB, however it retails for $45!!  Ain’t no body got that kinda green for a cutsie little pillow in my house!  So using this pillow design as my inspiration, I found some dish towels and pompoms and made my own!
dishtowel-pillow-supplies

Normally I make pillow covers because they are easy to change with the seasons or let’s be real, when I change my mood!  However I like this pillow so much I sewed it shut, so no changing this baby out!

Make your own dish towel throw pillow – here’s how!

Items you need:
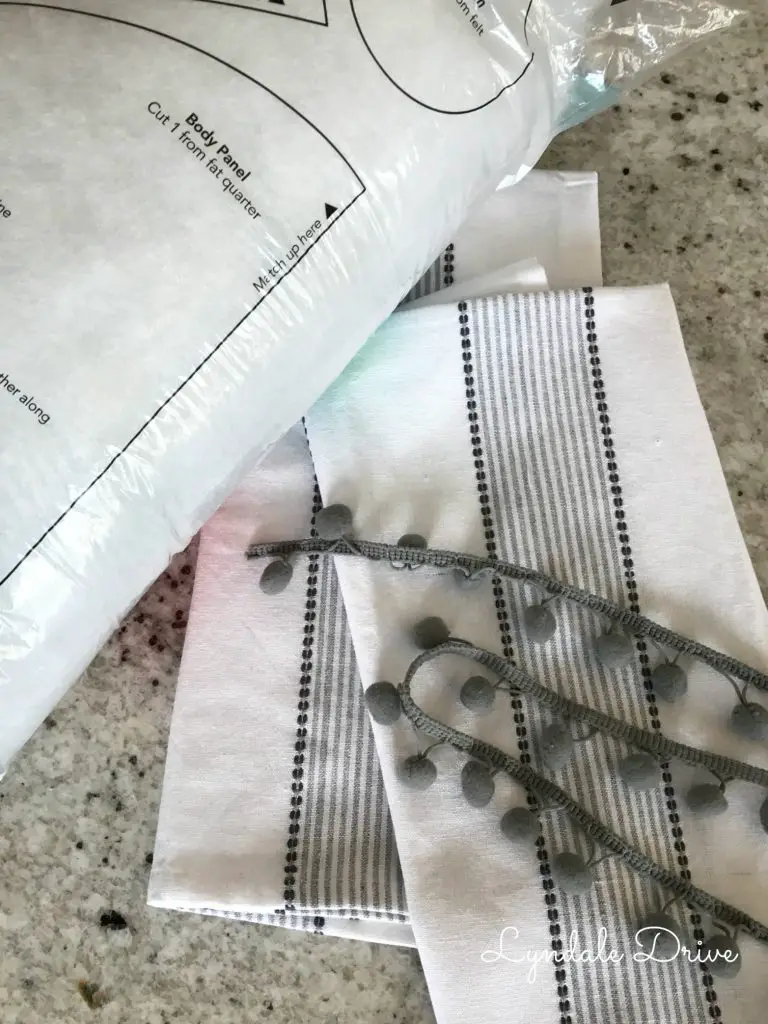
2 – Dish towels that are alike
Thread
Sewing machine – unless you trust fabric glue or like hand sewing……yuck
Pom Poms (optional)
Fiber Fill

Step 1  Start by cutting your dish towels to the size you want for your pillow (remember to leave enough fabric for seam allowance, about an inch per side)

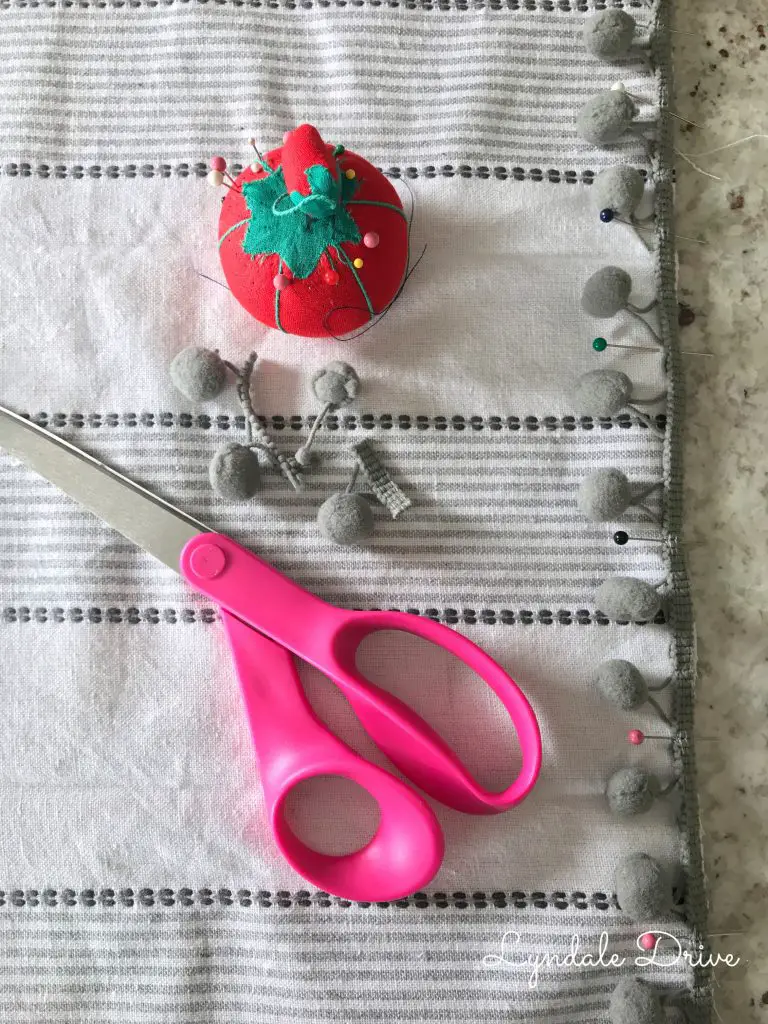
Step 2 With your dish towel fabric (pillow print side up) lay your pom poms on the edge of the fabric, with the pom poms facing the center of the pillow.
pom-poms

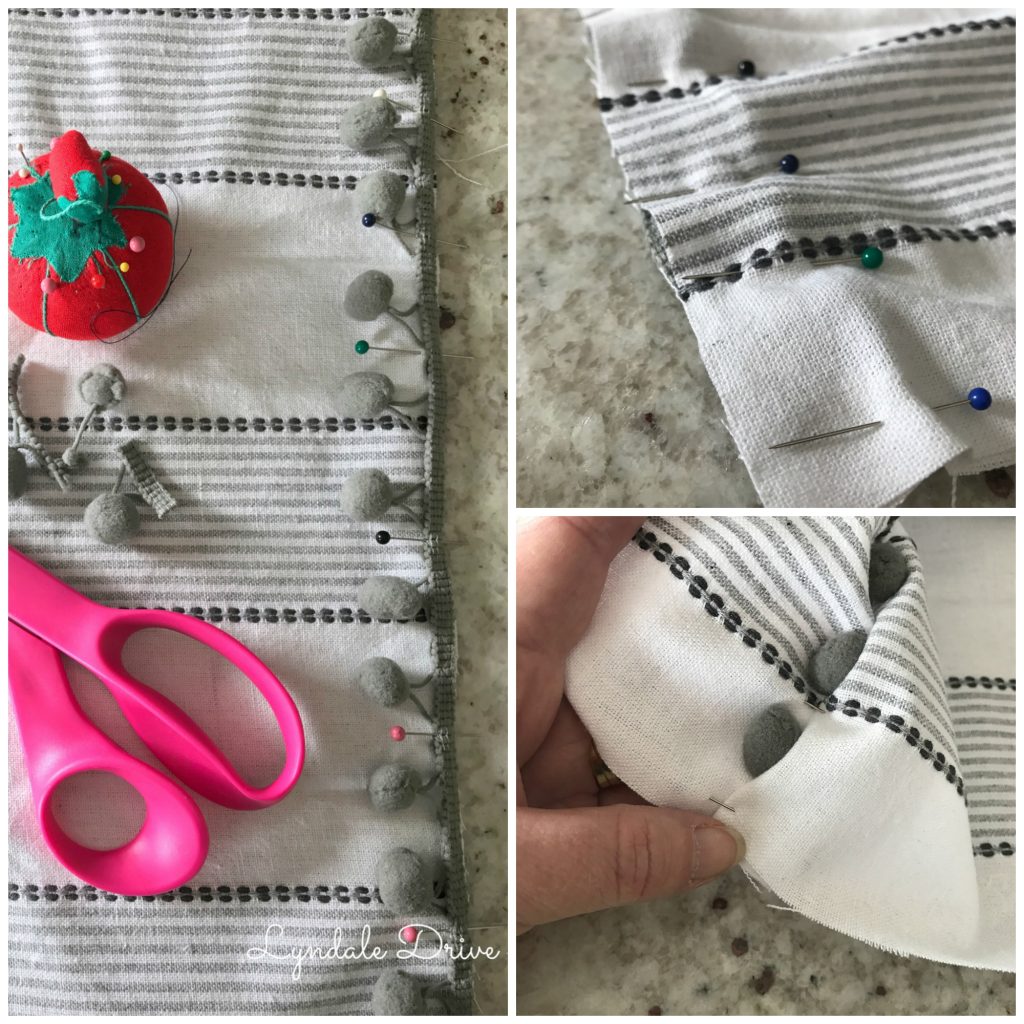
Step 3 Once the pom poms are in place, lay the other dish towel (pillow print side down) and pin the pom poms in place on each edge.  (when pinning, make sure the right sides are together and the pom poms are tucked inside.
adding-pom-poms

Note:  If you are not adding pom poms to your pillow, you can skip these two steps an just pin your two towels together.

Step 4 Carefully sew the two dish towels together making sure you catch the pom pom edge when sewing.

Step 5 Now pin and sew together the other two edges of the pillow leaving about a 2 inch opening on one side to add the fiber fill.

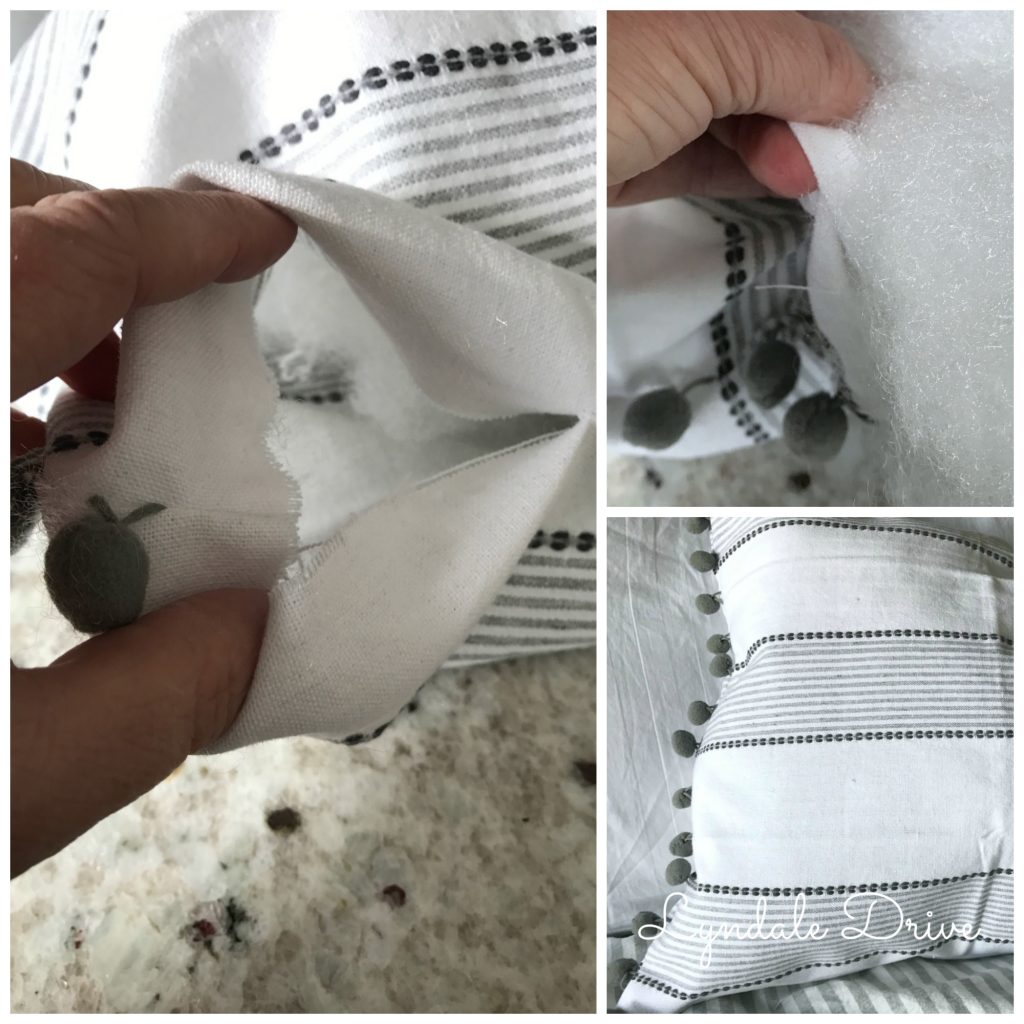
Step 6 Turn your pillow right side out by turning it through the opening you left for the fiber fill.
stuffing-pillow

Step 7 Add fiber fill to desired fullness.  I left my pillow fairly empty because it won’t be used as an actual pillow, only for looks on my bed and I like them to look soft and squishy not stuffed FULL!

Step 8 Hand sew the 2 inch opening together.  Make sure you tuck the raw edge in and sew using a slip stitch so the stitches and raw edges are concealed within the pillow.

Step 9 ENJOY!
dishtowel-pompom-pillowdishtowel-pillow
If you want to make your own dish towel pillow but don’t have time now – Pin it Girl!  I’ll be here when you have time!

How-to-make-dishtowel-pillowsEnjoy those dish towels – if the form of a pillow instead of during the act of doing dishes!

Signature LD

  • Tweet
  • Email
  • Print

Leave a Comment
DIY// Featured// Master

« Designing a fireplace makeover
Reupholstery – It’s harder than you think! »

Leave a Reply Cancel reply

Your email address will not be published. Required fields are marked *

This site uses Akismet to reduce spam. Learn how your comment data is processed.

Hello! I’m Jodi

I'm glad you're here! This is where I make my dreams of DIY projects, home renovations and crafty ideas become reality. {I am serious - I dream of these things} I hope you decide to stick around, and follow along as my husband Mike and I make these dreams a reality.

Never Miss Another Post

If you love what you see now and don't want to miss another post....Join Me! I promise I won't flood your email with junk, only a friendly reminder that I published a new post!

Categories

Archives

how-to-paint-faux-brick-concrete-walls
painting-your-garage-door-black
  • Home
  • About Me
  • Our Home
    • Master
      • Shiplap Shelf
      • How to keep your white sheets white
      • How to upcycle old sweaters into Christmas stockings
      • Dimming the light that shines in the night
      • Master bedroom night stands
      • Our Master “Pinterest” bedroom……
      • Shiplap wall for less than $50
    • Mancave
      • How to build a sliding barn door
      • The Dog’s House
      • A Shiplap Ceiling
      • Painting a Faux Brick Wall
      • Upcycle old frames….I’ll show you how!
      • A bi-fold door in disguise……….
      • A place to call his own……..kind of!
      • how i made industrial lights for the bar
    • Front Porch
      • Hydrangeas are in the air
      • Red, White and Gray-It’s almost Independence Day!
      • Say Hello
      • Holiday Home Tour (Part 1)
    • Kitchen
      • Upholstery 101
      • Harvest Table – Part one
      • Harvest Table – Part Two
      • Holiday Home Tour (Part 2)
      • How to organize a mini office space in your pantry
      • New Bling {Cabinet Hardware} for the Kitchen
      • Transform your dining room table
      • Trays, not just for carrying your lunch in grade school anymore!
    • Living Room
      • Designing a fireplace makeover
    • Garage
      • Got Paint?
  • DIY Projects
    • Painting/Crafts
      • DIY Poster Sized Word Art
      • Fresh Cut Tree Sign
      • Farmers Market….
    • Simple Sewing
      • Add your favorite recipe to a tea towel
      • How to upcycle old sweaters into Christmas stockings
      • Vintage Stockings for $3 or less
      • Upholstery 101
    • Trash to Treasure
      • How to paint on old screens
      • New life for an old brass fixture
    • Miscellaneous
      • How to keep your white sheets white
      • New Bling {Cabinet Hardware} for the Kitchen
    • Electircal
      • how i made industrial lights for the bar
    • Woodworking
      • How to build a sliding barn door
  • Contact Me
    • Disclosures

Copyright © 2022 · Dainty theme by Restored 316

Copyright © 2022 · Dainty Theme on Genesis Framework · WordPress · Log in

loading Cancel
Post was not sent - check your email addresses!
Email check failed, please try again
Sorry, your blog cannot share posts by email.